The encoder supports Ethernet,WiFi and 4G. The specific configuration of the network is described in detail below.
Ethernet
The encoder can provide an Ethernet access through a USB to RJ45 converter. This port can be configured with an IP address and default setting is DHCP . It will automatically get a complete IP address, netmask,gateway and DNS according to this LAN.
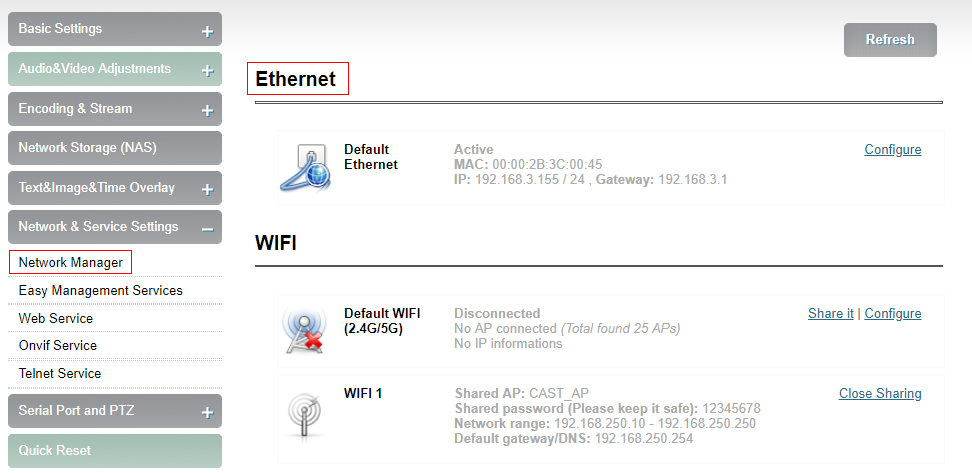
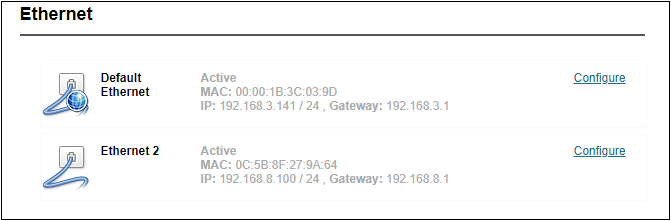
Click "Network & Service Settings", click "Network Manager" to enter the following interface, you can see the IP address with Ethernet.
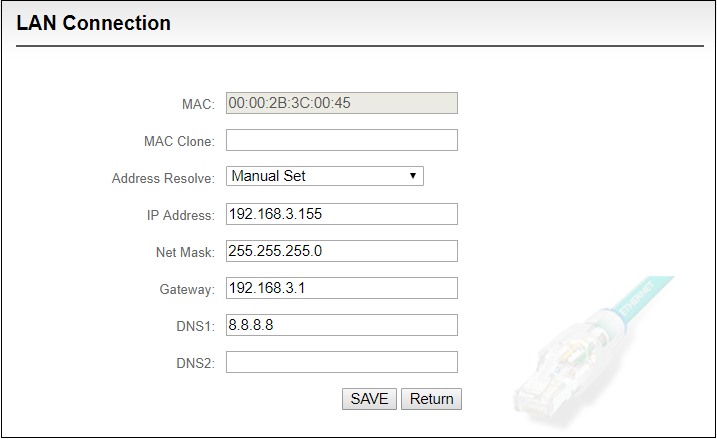
In addition to the way of DHCP , the encoder also supports manual IP assignment. To change the IP of the wired network, click “Configure” button in the Ethernet to enter the interface for configuring the IP. There are two ways to get the address, one is DHCP, and the other is to manual. To use DHCP to automatically obtain IP, you must first ensure that the router or switch has enabled the DHCP service. This method is simple and convenient, but the IP obtained by DHCP changes continuously, and you cannot directly know what IP address the encoder gets. To use manual, you need to enter a fixed IP to the encoder, and this IP address is fixed as long as the encoder does not restore the factory settings, this method is more stable. Therefore, the two methods have their own advantages, and can be selected accordingly.
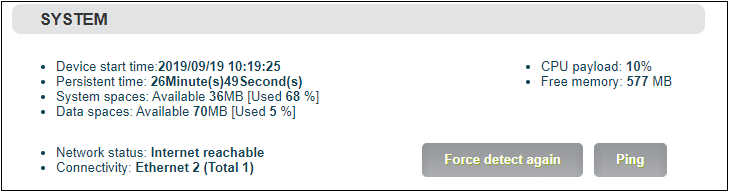
After Ethernet is configured correctly, you can see that the connection status is “Internet reachable” and the Internet connection is the default Ethernet port on the Dashboard.
Note: Because the device writes the configuration file to the system regularly for saving, the device can not power off immediately after the IP address is manually configured or modified, otherwise the IP address may be lost. If you want the IP address configuration to be saved immediately, you can restart the device once on the WEB page.
WiFi network
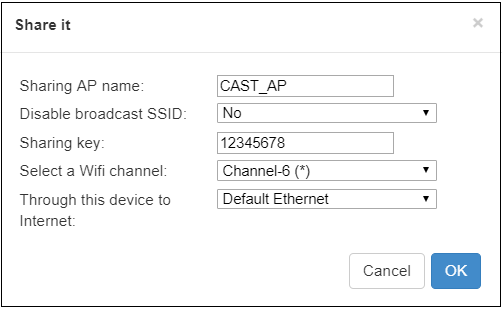
WiFi configuration has two modes, which can realize two functions. "Default WiFi" is used as ordinary terminal, connect router WiFi signal, use WiFi to transmit video; "WiFi1" is as AP hot spot to be connected by other devices, default hot spot name is "CAST_AP" and the hot spot password is "12345678". You can use a mobile phone or laptop to connect to this hot spot to log in and manage the encoder. After connecting to this hot spot, you can log in to the encoder’s web page by typing "192.168.250.254" in the browser of your mobile phone or laptop. As shown in the figure below, click “Set as Shared Hot spot”of WiFi 1 to customize the shared hot spot name and shared password. You can select the WiFi channel and the network card to be shared.
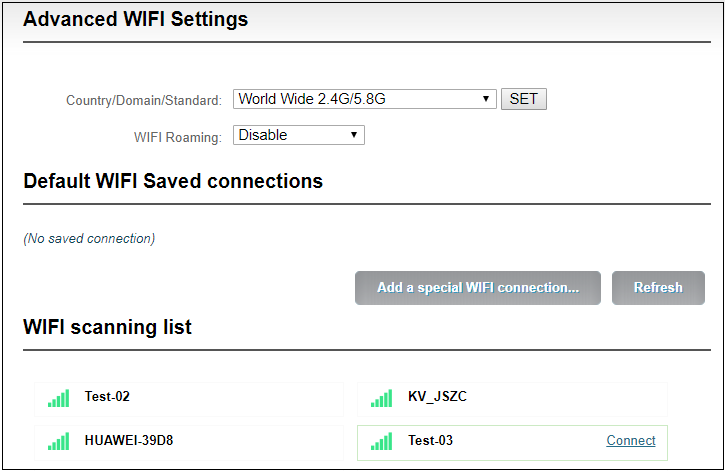
For normal use, just click "Default WiFi" option to enter the interface that connects to WiFi.
Click “WiFi scanning list” to connect,usually you need to enter a WiFi password to connect successfully.For some WiFi that hides the SSID, you can also connect a hidden hot spot by manual. The WiFi that has been successfully connected, the encoder will save this record. By default, this WiFi will be automatically connected next time. You can also select this saved WiFi hot spot to disconnect or delete the WiFi.
Note: In order to reduce the wireless network interference and obtain a good video playback experience, it is recommended to place the WiFi router and encoder in the visible range and connect the encoder to the 5.0GHz of the WiFi, and set the router to a relatively clean channel. In order to make sure the fluidity of the video while streaming with WiFi, the coding rate can be appropriately reduced as necessary.
When connecting to WiFi, there are two ways to obtain an IP address, DHCP and manual. Same as Etherenet, if using DHCP, be sure that the wireless router has enabled the DHCP service (usually turned on). This method is simple and convenient, but the IP obtained by DHCP changes continuously, and you cannot directly know what IP address the encoder gets and network cable connection is required for management. To use manual, you need to enter a fixed IP to the encoder, and this IP address is fixed as long as the encoder does not restore the factory settings, this method is more stable.
Note: When using WiFi function, it is better not to connect to the Ethernet at the same time, because Ethernet has higher priority than WiFi. If you use WiFi for streaming while need to connect to the Ethernet configuration, you must delete the gateway of Ethernet, make sure only one IP address of Ethernet is used to manage the encoder. If not, it may cause that WiFi streaming is not actually used even WiFi is connected.
4G network
When the encoder is inserted into the USB 4G network card, the "Ethernet" connection will add an "Ethernet2". When the USB card connects to the 4G network, it will get the IP address and other parameters from the 4G gateway, which will be displayed as "Active" status.
If the dial-up status of the USB 4G network is normal, you can see that the "Network status" is "Internet reachable" and the "Connectivity" is "Ethernet2" (If using the Ethernet port connection, it will be displayed as "default Ethernet port")
Note: Please confirm whether the USB 4G card has turned on the automatic dial-up connection function and whether the SIM card balance is sufficient, otherwise the network may not be available.
You can plug the USB 4G card into the computer to test whether it can provide normal Internet service.
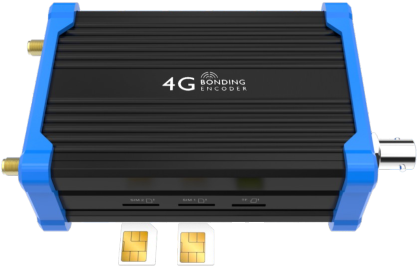
Because the device has built-in 4G modules, you can also plug in SIM card directly to connect to the 4G network. Because it does not support SIM card hot plug-in, it is necessary to insert SIM card before starting the device.
After the device starts, click on the "Network & Service Settings" menu of the WEB interface to enter the "Network Manager"- "Wireless WAN" interface.

Click "Configure" and manually "Add a New Wireless Broadband Connection".
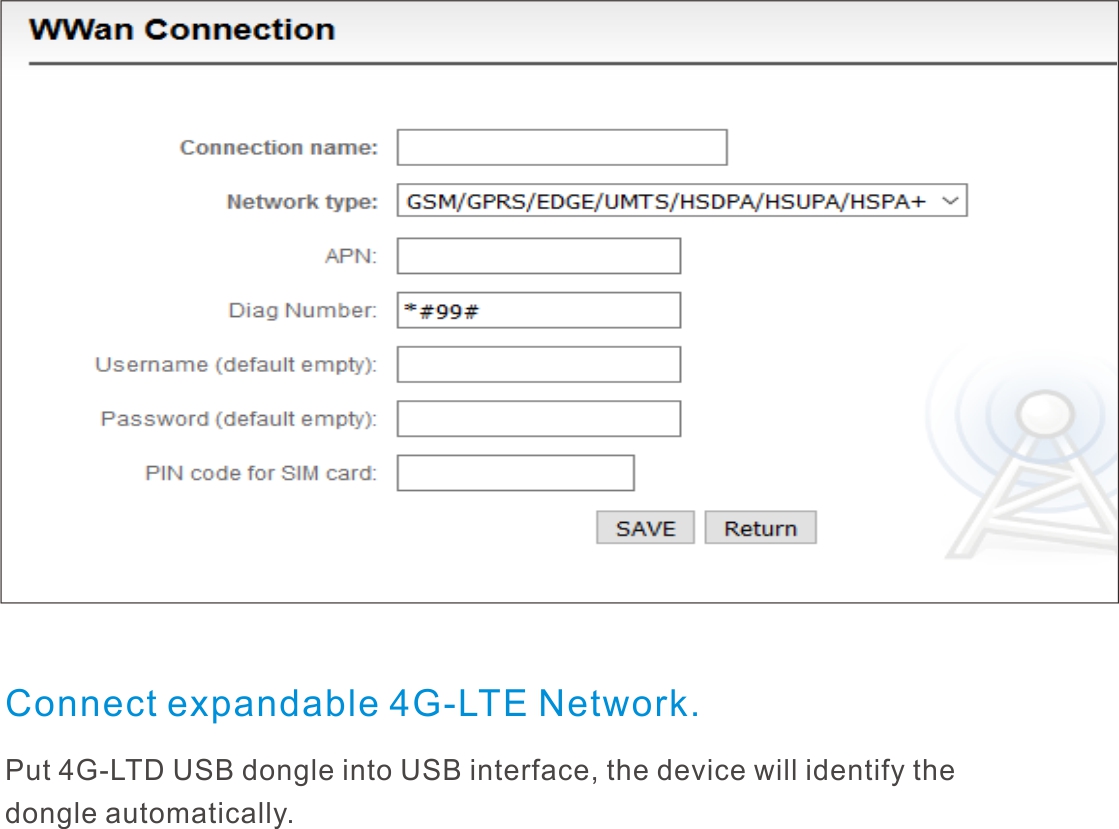
Fill in the dialing parameters:
- "Connection Name": is used to identify connections and can be set at will.
- "Network type ":chooses the format of 4G network.
- "APN ": should be filled in correctly according to different operators.
- "Dial Number": varies according to the operator.
Easy Management Service
The "Local Link" is configured with a dedicated IP address on Ethernet (This is the failsafe IP address of the Ethernet port.Generally, do not modify this IP address.) . In this way, even if you forget the IP settings of the Ethernet, or if the IP cannot be learned because DHCP gets the address, you can still connect and access the device through the configured private IP address.
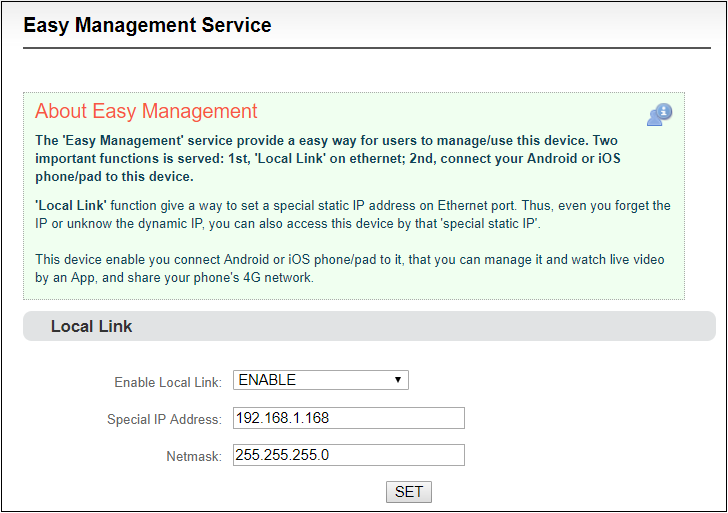
"Local Link" is to bind the encoder to a separate IP address, this IP address does not affect the use of other network cards, in special cases, it can play a role to manage encoder, this address can be manually changed, the default address is 192.168.1.168.
Note: When accessing the device through a convenient managed IP address, your computer must have an IP address on the same network segment.
Android APP
- Please download the Android APP from Kiloview website,then install it.
(http://www.kiloview.com/companyfile/shi-pin-bian-ma-qi-Android-APP-45.html)

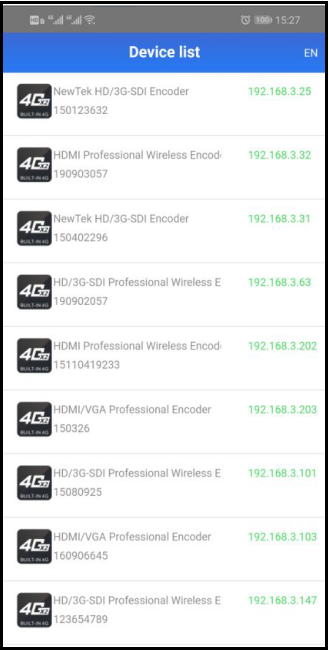
- Connect the phone to the same network segment of the WiFi that the device connects. (You can share the hotpots while using P and G series encoder) .Open the APP and search the connected devices under the same network segment automatically in the device list.
- The device information shown in the list includes device interface information, device serial number, device IP address, etc.
- Click the device from the device list to enter into management page.
-
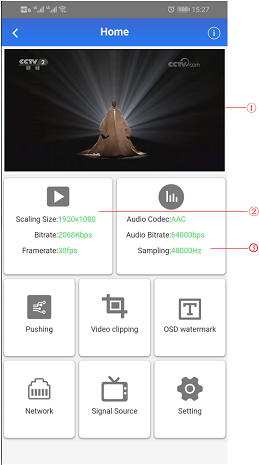
On the configuration page, it shows video source image on the area of ① to monitor whether video source is normal. This image stream is refreshed in three seconds.
-
Click②for main stream configuration .
-
Click③for audio encoding configuration .
-
Click“Pushing”for stream service configuration .
-
Click “Video Clipping” for video clipping function.
-
Click “OSD watermark” for image overlay function configuration. APP only supports text and time overlay configuration, image overlay is configured on Web page .
-
Click “Network” for network configuration .
-
Click “Signal Source” for audio and video source choice page .
-
“Setting”are used for quick reset, device reboot, restoring factory settings and device name modifications.
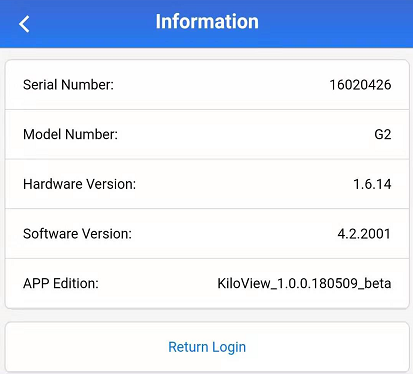
Click  and enter into device information page.