
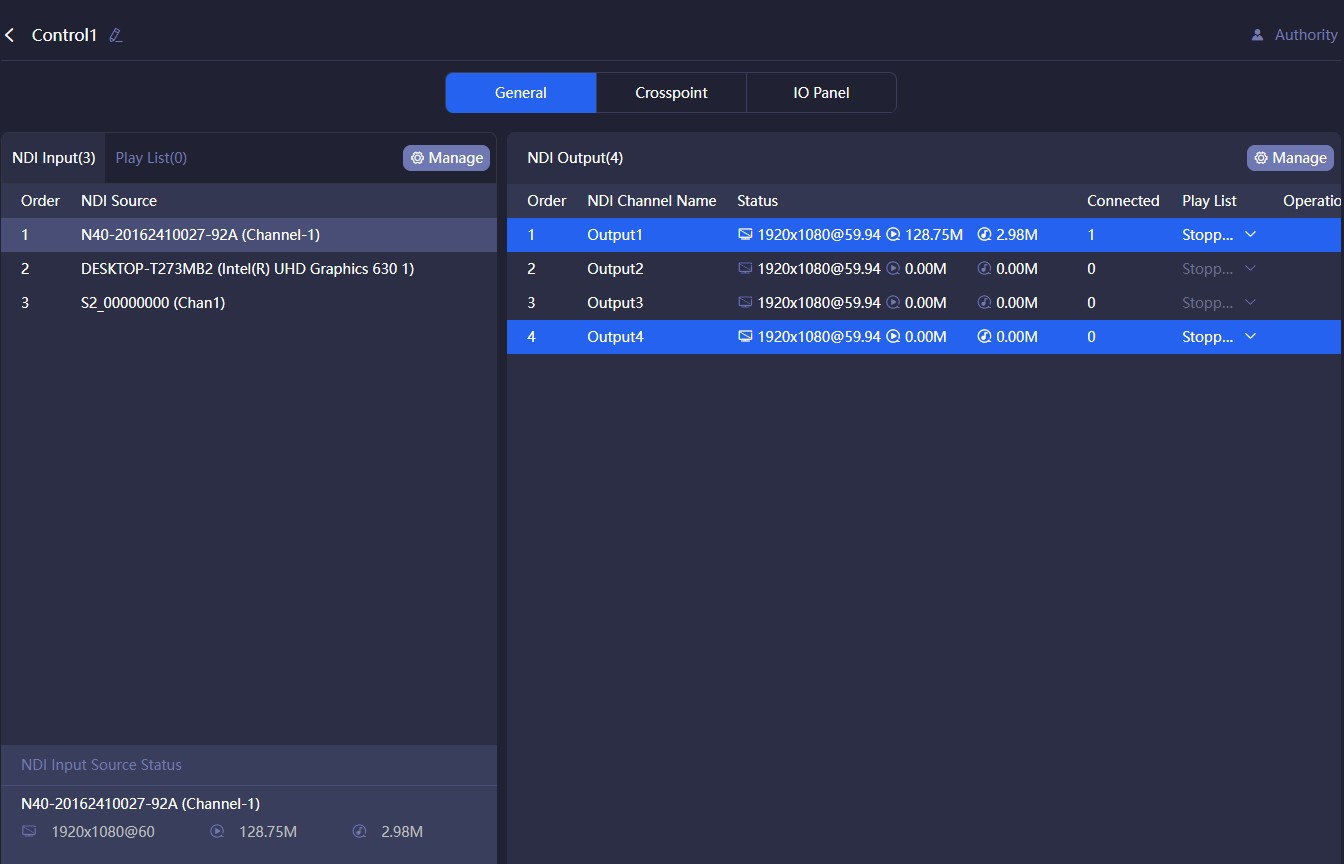
To add the NDI source and NDI output channel required by the current panel through the "Manage" button corresponding to NDI input and NDI output.
Introduction:
Note
The resources that can be used for NDI input and output are the NDI video source and NDI output channel added in "Chapter 4 Resource Management”.
Status of NDI input source
Select the NDI source, the information status of the NDI input source is displayed at the bottom.
Note
The resolution and frame rate of the source.
The real-time bitrate of the video encoding.
The real-time bitrate of the audio encoding.
NDI Output
The NDI output channel created when the panel is added. When there is a device at the back end to get stream from a certain output, the output status displays the decoded resolution, frame rate, video and audio bitrate.
Connected:The number of the back-end streams is decoded by the NDI output channel.
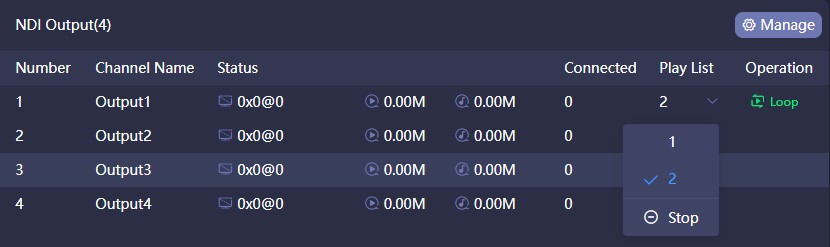
Play list:Click the down button to select play list. When you want to change, please stop the current one first. Please refer to the "Play List" chapter for more details.
Operation: Set the mode of the play list to “Loop” or “Single” play. After the end of a single play list, the loop playback will continue to play the last NDI source by default; after the loop is played to the end of the last NDI source, it will return to the first NDI source to continue the loop play.

Play List
When the NDI output channel selects the loop, all the NDI input video sources in the list will be displayed. A circle of time progress status will appear on the right side of the video source.

Note
The play list is used to establish an automatic switching relationship between input and output. According to the set time, the output channel automatically switches to different NDI sources.
The play list consists of multiple NDI sources and playing time.
NDI sources can be added repeatedly, and the playback time is specified to second.
Crosspoint/IO Panel
Configure the NDI input and output through the cross-point panel. The cyan square indicates that the NDI input sources will output from the NDI output channels.
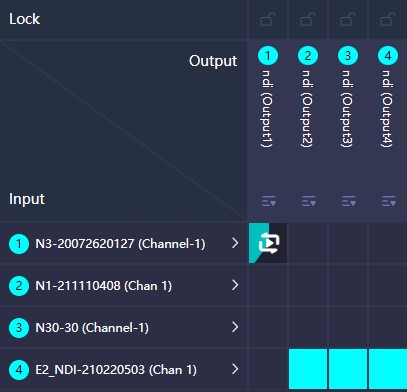
In the "IO Panel", only the display method is different, and the effect of all operations is exactly the same as the "Crosspoint". Click the OUT1 output channel, you can see that the first NDI source is displayed in cyan, which means that the NDI video source is output from OUT1, click the second video source, when it becomes blue highlight, it will seamlessly switch to the second video source and output from OUT1.

Note
You can copy one NDI input source to multiple NDI output channels:
Select or stop play list.
Under the unlocked state, the NDI video source of multiple outputs can be switched. When in the locked state, the NDI output channel cannot be manually switched. When the output channel is used by multiple control panels, the NDI output can be switched on any panel. To prevent misoperation, you can use the locked state.
The play list selected by the NDI output channel, and the NDI video sources played will show the current playing time.
The functions of the IO panel are the same as the crosspoint panel.