

Table of Content:
- 24/7 stream my mobile phone camera
- 24/7 stream my computer screen
- 24/7 stream my security camera
- 24/7 stream my external (third-party) media
- FAQ
Making a 24/7 live stream to YouTube (or any other public video platform) benefits your audience, brings profit, and makes fun.
To stream infinitely, you need tools or Apps to process your media source and deal with the IP stream data. Here we introduced four common 24-hour live stream scenarios and relevant detailed steps for you.
| Scenes | Solutions | Cost | Stability | Energy Cost | Easy to Use |
| 1. Phone Camera Streaming | Phone + OBS | ★ | ★★ | ★★★★ | ★★ |
| 1. Phone Camera Streaming | Media Gateway | ★★★ | ★★★ | ★ | ★★★★ |
| 2. Screen Camera Streaming | OBS | Free | ★★ | ★★★★ | ★★ |
| 2. Screen Camera Streaming | Encoder | ★★ | ★★★ | ★★★☆ | ★★★★ |
| 3. CCTV Camera Streaming | FFMPEG | Free | ★★ | ★★★★ | ★ |
| 3. CCTV Camera Streaming | Media Gateway | ★★★ | ★★★★ | ★ | ★★★★ |
| 4. Video File Streaming | Local PC | Free | ★★★ | ★★★★ | ★★ |
| 4. Video File Streaming | Remote VPS | ★★★ | ★★★★★ | ★★ | ★★ |
Scene 1: 24/7 stream my mobile phone camera
If you have a used smartphone, you can connect it to the charger and do the 24/7 streaming using YouTube APP.
But the problem is: you probably do not have 1,000 subscribers to start your mobile stream, or your phone may be old enough for the video encoding task that it may go overheated after hours of streaming.
To make your homemade live stream more stable, you can try the following steps:
- Install NDI HX Camera on your phone.
- Install OBS Studio on your computer, and install the NDI plugin (or select a hardware media gateway).
- Run the NDI HX Camera APP on your phone, and detect it on OBS (or your hardware media gateway).
- Configure streaming setting on OBS or your hardware, and go live.
Let’s go through these steps in detail.
NDI is a video transmission solution that lets you take video on one device and get it on another device within your local network.
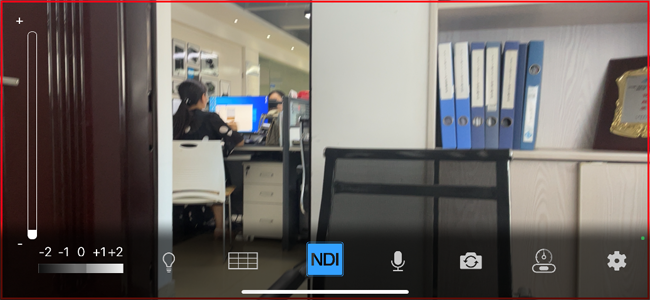
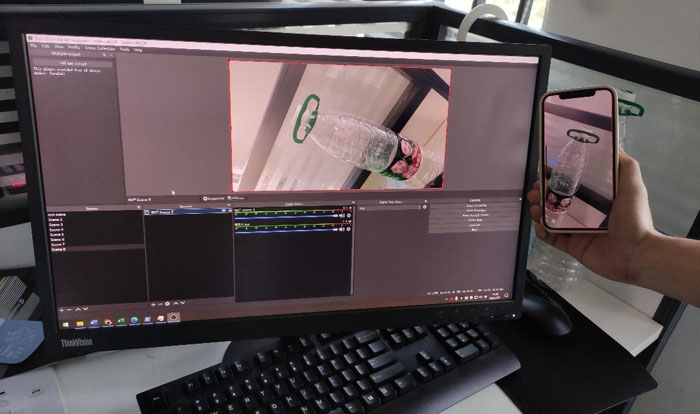
When installed NDI HX Camera App (costs around $20), your mobile phone becomes an NDI video source (You can use any similar NDI camera APPs as well):
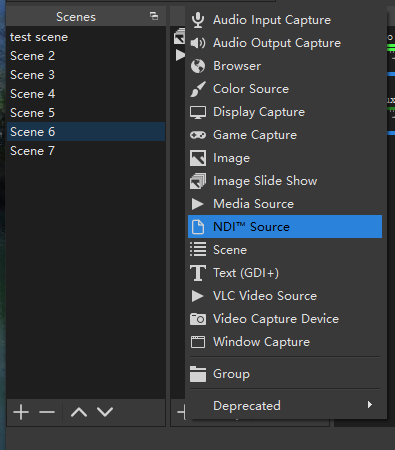
OBS is a free tool that detects NDI video sources and streams to any target platform (such as YouTube). In this case, you will install the software plus the NDI plugin to make sure that OBS can find your mobile phone camera.
When installed, you can see the “NDI Source” option under the “Sources” panel:
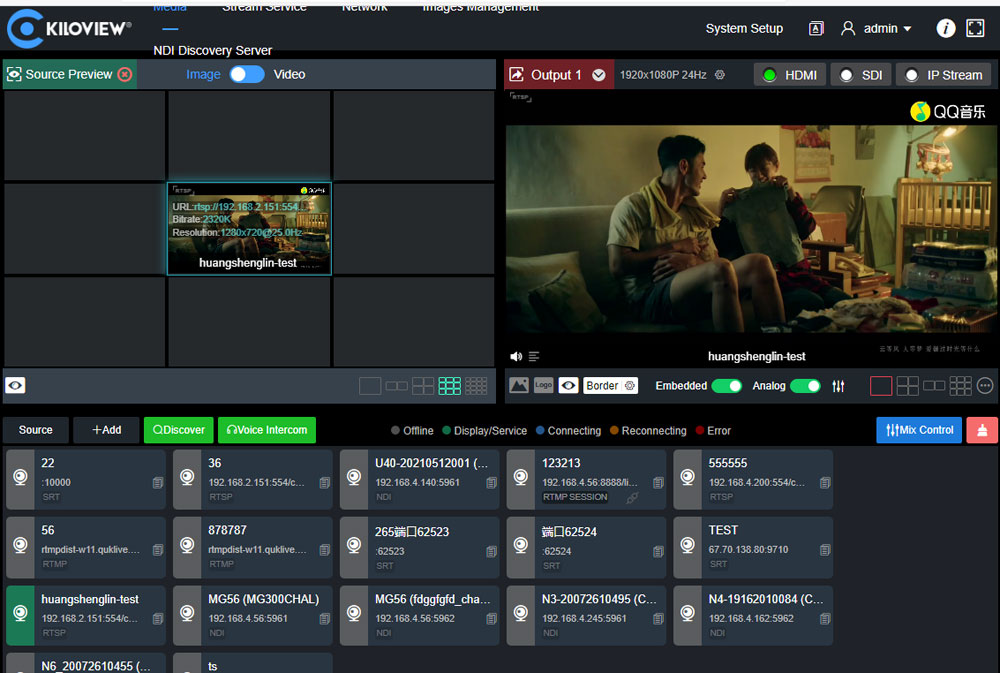
One of the most impressive functions of NDI is that any client can detect all local NDI sources automatically, so now, you can add the NDI source and preview our mobile phone camera in real-time now:
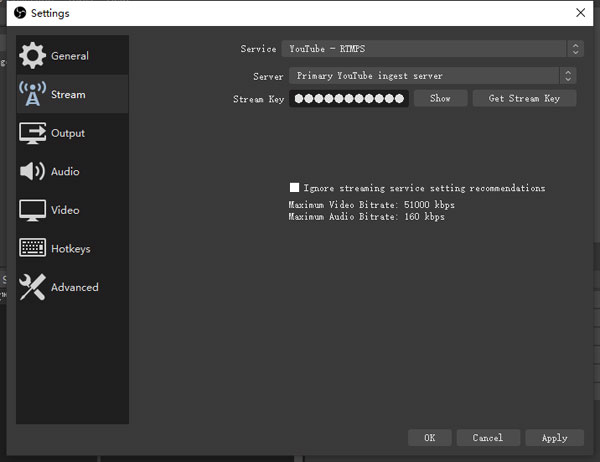
After that, you need to go to OBS, find “Settings”, select the “Stream” option, choose the “Youtube – RTMPS” for the 24/7 service platform, and enter your stream key below.
If you don’t know where to get your YouTube stream key, check the FAQ part at the bottom of this blog.
After that, your mobile phone camera live stream will be on YouTube. Don’t forget to charge your phone and keep your computer working.
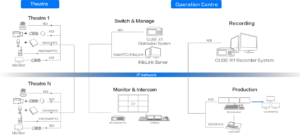
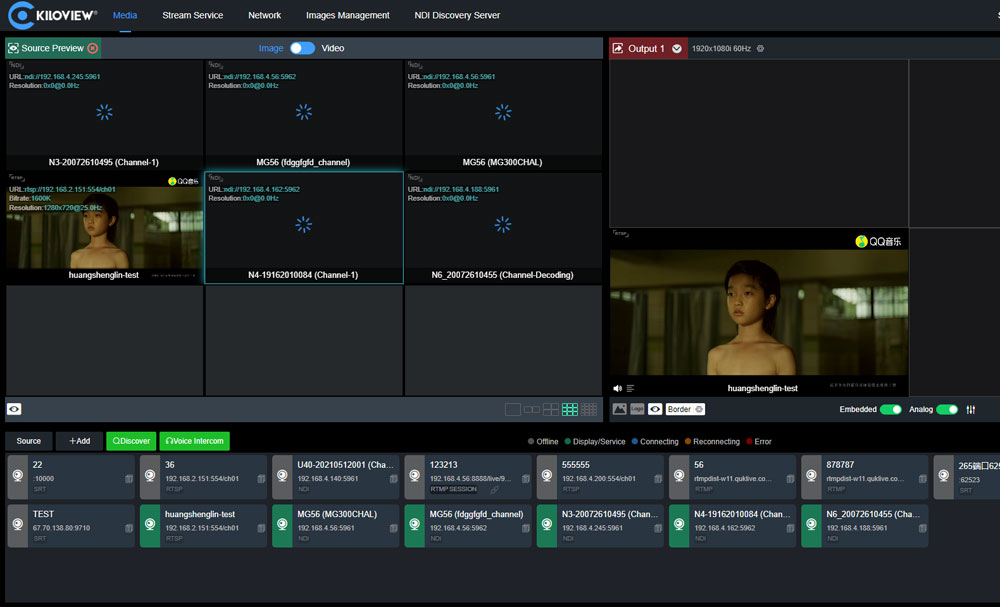
Don’t want to let the computer open? Try to get a hardware media gateway. It detects your NDI source and a dozen of other IP streams (such as RTSP, RTMP, SRT, HLS, and so on) and can stream your video to various platforms, including YouTube in the built-in web-console 24/7:
Scene 2: 24/7 stream my computer screen
Maybe you have some exciting content on your computer, or you just want to share your screen to YouTube/Facebook/Twitch or more platforms 24/7.
Here are your steps:
- Install OBS Studio on your computer (or select a hardware video encoder).
- Configure the video capture settings on OBS (or connect the hardware encoder to the computer);
- Configure the streaming parameters on OBS (or on encoder), and go live.
Let’s go through these steps in detail.
You can capture your screen and stream with the official App (such as Twitch Studio). In contrast, OBS is a proper solution for more generic purposes.
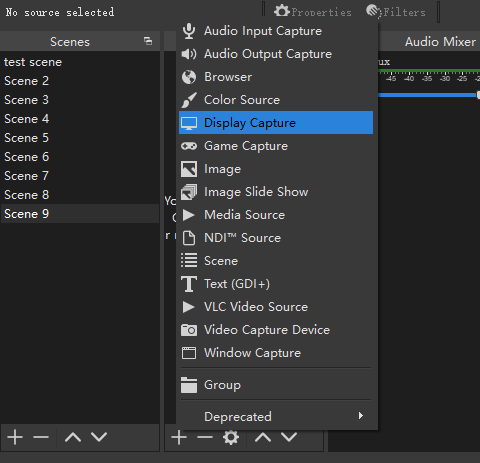
After installing the OBS Studio on your computer, you can create a new source by clicking the “+” icon and choose “display capture” or “game capture”. The screen capture will be displayed in the preview area:
Since it captures your screen, now you need to find “Settings”, go to the “Stream” option, choose the “Youtube – RTMPS” for the 24/7 service platform, and enter your stream key below.
After that, your screen capture live stream will be on YouTube in real-time.
If your computer does not work well for such a task, you can try a hardware decoder. A hardware decoder spares your computer stress and streams your screen capture automatically:
Scene 3: 24/7 stream my security camera
Your security camera is working 24/7, so it is a perfect public video source.
To get it live on YouTube, you have to deal with the video transmission protocol, normally RTSP (the protocol most CCTV cameras use).
There are two tools to help:
- FFMPEG
- hardware media gateway
FFMPEG is an open-source streaming tool that empowers you to process your video or stream it to any platform.
When using it to make the 24/7 stream, you need to do the following:
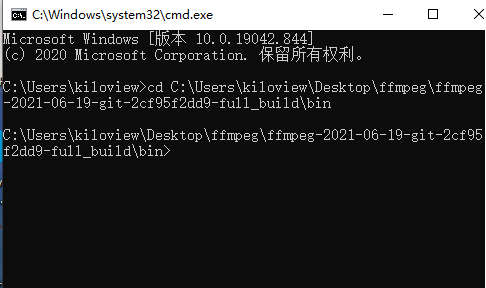
- Download FFMPEG from its official website. When finished installing on your computer, you can find the “ffmpeg.exe” file on the downloaded directory: “ffmpeg” > “ffmpeg-XXX-full_build” > “bin”.
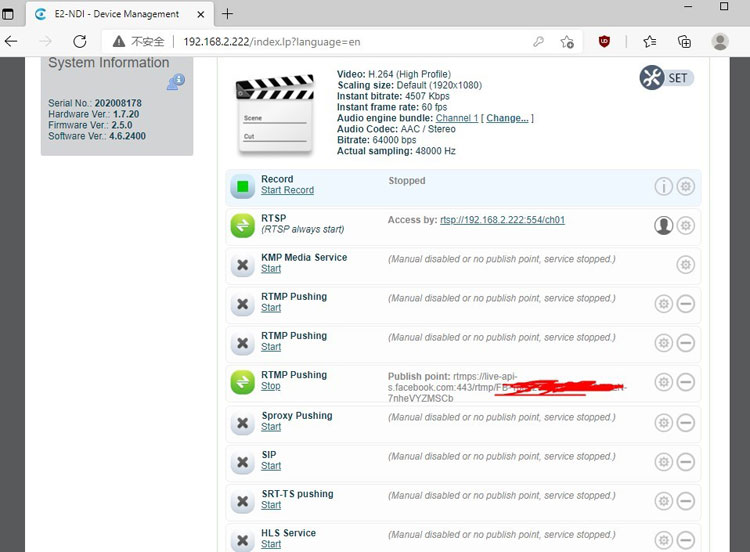
- Find the RTSP stream URL of your security camera. Ask your camera manufacturer or check the manual for the local stream URL. In most cases, it looks like “rtsp://IP_ADDRESS/CHANNEL”. Can’t find the URL? No problem, if your camera has an SDI/HDMI out port, connect it to a hardware media gateway (check the solution below).
- Test your RTSP stream. Open your command line console by press “Windows + R” and type “cmd” in the “run” system menu. Then change the working directory to where “ffmpeg.exe” located by typing: “cd {your directory}”:
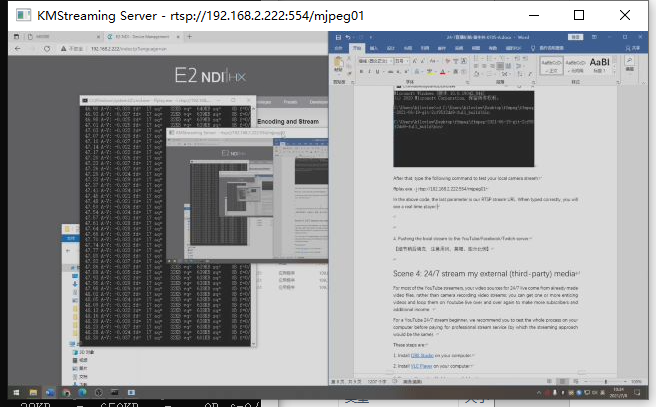
After that, type the following command to test your local camera stream:
ffplay.exe -i rtsp://192.168.2.222:554/mjpeg01In the above code, the last parameter is our RTSP stream URL. When typed correctly, you will see a real-time player of your CCTV camera (in this case, we use the screen capture instead):
4. Pushing the local stream to the YouTube/Facebook/Twitch server. When we checked our stream using ffplay.exe, we can push the stream to YouTube now. Press “Ctrl + C” to terminate the real-time play, or reopen the command console and go back to the same working directory, and type the following code:
ffmpeg -i rtsp://IP_ADDRESS/CHANNEL -c:v copy -c:a copy -f flv rtmp://a.rtmp.youtube.com/live2/YOUR_STREAM_KEYChange the above RTMP address to your CCTV camera address, and replace the stream key with your own. If you can’t find it, check the FAQ part at the bottom of this page.
Of course, you can change the target stream platform to anyone you like by changing the right RTMP address.
After you input the code, your stream is online on YouTube.
As FFMPEG is running on your computer, if you have a 24/7 stream plan, you have to keep your computer running all the time.
Using a hardware media gateway helps you to avoid this situation. It gets the RTSP signal and streams to your platform simultaneously. Once configured, it will stream your security camera to YouTube relentlessly.
Scene 4: 24/7 stream my external (third-party) media
For most of the YouTube streamers, your video sources for 24/7 live come from already made video files, rather than camera recording video streams: you can get one or more enticing videos and loop them on Youtube live over and over again to make more subscribers and additional income.
For a YouTube 24/7 stream beginner, we recommend you test the whole process on your computer for a while before paying for professional stream service.
These steps (both for test computer and for official platform server) are:
- Install OBS Studio on your computer.
- Install VLC Player on your computer.
- Prepare the video file(s) in one folder.
- Select the video files as a looping playlist.
- Finish stream setting and go live.
Let’s go through these steps in detail.
OBS is a free tool that helps you stream your media files to any target platform (such as YouTube).
VLC is a free tool that helps you to create a looping playlist for your 24/7 stream.
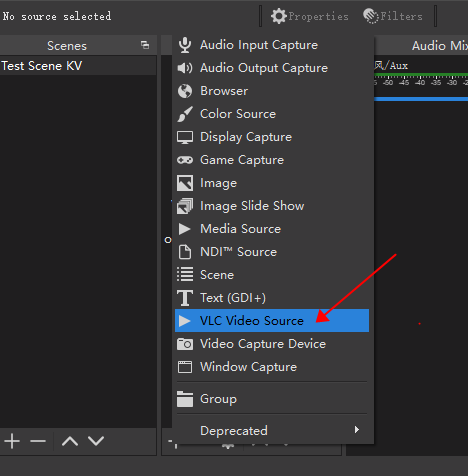
When you installed OBS and VLC, open OBS, add a source. You will find the “VLC Video Source” option (otherwise you need to make sure you installed OBS and VLC both):
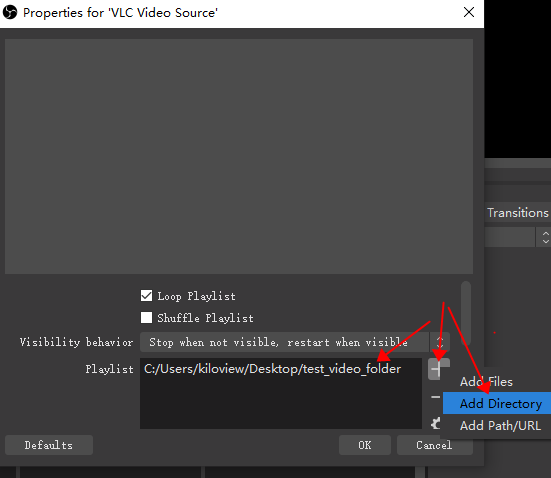
Next, in the source properties, tick the “Loop Playlist” option, choose “add directory”, and select the video folder you prepared:
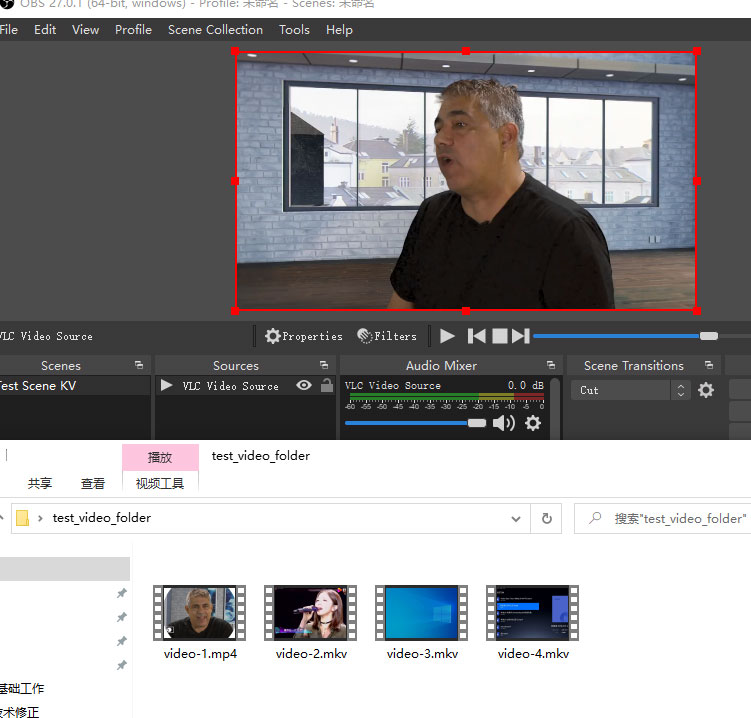
As we have put four videos in our folder, OBS will start to play these videos over again (because we have defined the loop option).
Now you need to find “Settings”, go to the “Stream” option, choose the “Youtube – RTMPS” for the 24/7 service platform, and enter your stream key below.
After that, your screen capture live stream will be on YouTube in real-time. You can put the stream title and description on your YouTube Studio page later.
Above is the process of the home test. If you have gained some fundamental understanding, find a remote server to do the same thing. Because a VPS is more stable than a desktop and is energy-saving, most 24/7 streamers are using a virtual machine rather than a home PC.
One of the well-known server platforms is Ohbubble, in which you can find various tailored plans for your 24/7 stream.
FAQ
Q: What is the bandwidth requirement for my 24/7 YouTube stream?
A: According to Google, the recommended speeds for different video resolutions are:
- 4K – 20Mbps
- HD 1080P – 5 Mbps
- HD 720P – 2.5 Mbps
- SD 480P – 1.1 Mbps
- SD 360P – 0.7 Mbps
Note that you need to make sure the uploading bandwidth reaches the above standard, especially when you stream at home because some ISP providers do not give you the same uploading bandwidth as downloading bandwidth.
Q: What if my 24/7 video live stream crashes?
A: Not a single machine is perfect. Even Obbubble’s gold plan guarantees only 99% server uptime. You’d better prepare a redundant server for the rest 1% (such as Vultr), so your streaming will not be affected by the downtime.
Q: How to get the audio source?
A: In OBS, you can adjust your audio hardware/source in “Settings” -> “Audio” and tweak the audio in the “Audio Mixer” panel.
In Kiloview’s hardware media gateway or hardware encoders, you can get the audio via either HDMI embedding or 3.5mm line-in and adjust the volume in the website console.
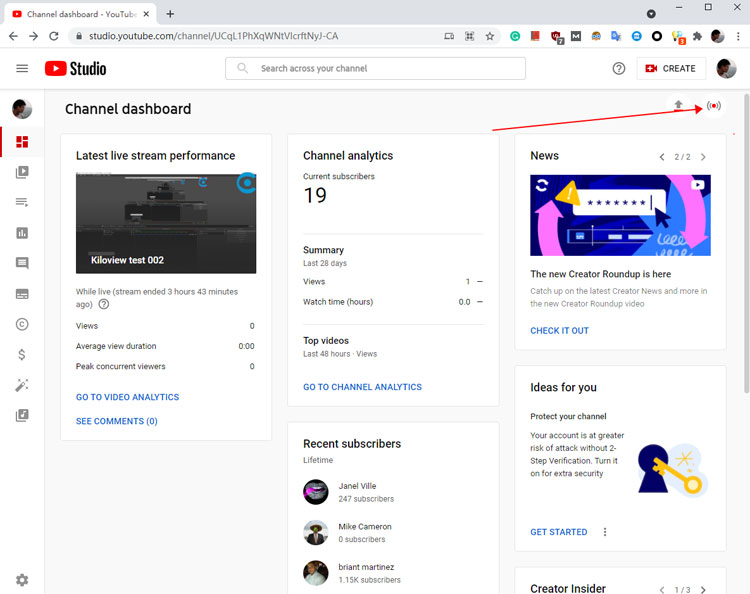
Q: Where to find my YouTube stream information?
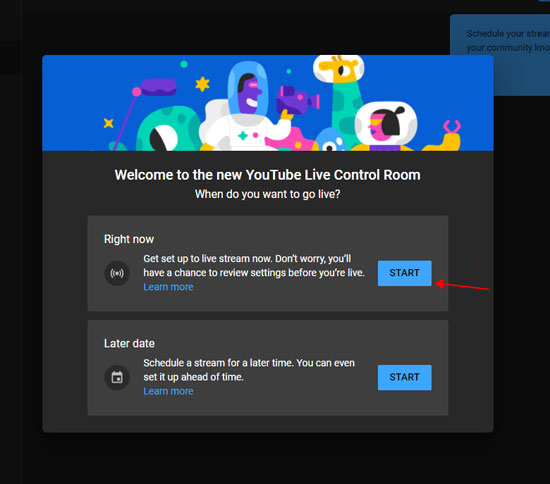
A: Go to YouTube Studio (https://studio.youtube.com/), login, and click on the “Go Live” icon:
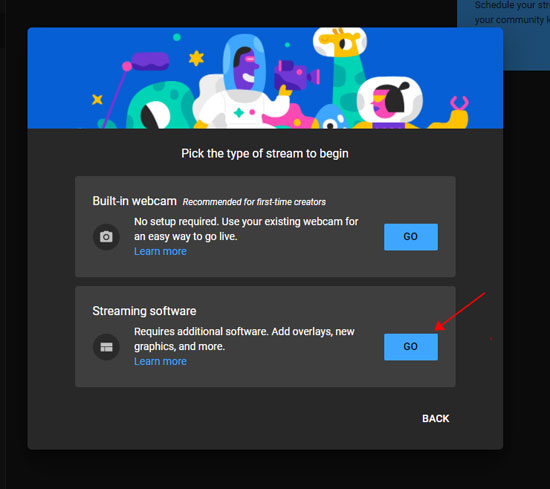
Now check “Start” on the “Right now” option and choose “Streaming software” on the following menu:
After that, you will see the stream URL and stream key as shown below (if you are a new streamer, YouTube will ask you to fill up the description before showing this page):
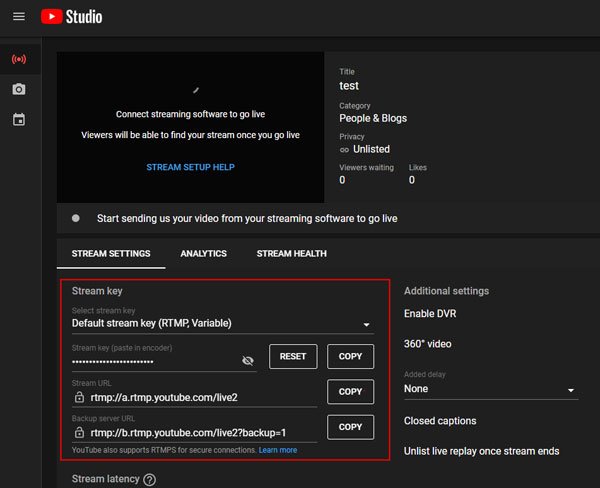
Never share your Youtube stream key with anyone else. If it leaks out, reset it immediately.