

Table of Content:
- Preparations for Streaming to Multiple Platforms
- Streaming Solution 1: OBS (Screen Capture) + Restream
- Streaming Solution 2: OBS (Screen Capture) + Multi-RTMP Plugin
- Streaming Solution 3: OBS (Screen Capture) + Self-host Server + FFmpeg Directives
- Streaming Solution 4: OBS (External Video Source) + Capture Card
- Streaming Solution 5: OBS (External Video Source) + NDI
- Streaming Solution 6: Hardware Encoder + Integrated Console
- FAQ about Multi-Platform Stream
Live streaming your game or any video content to multiple platforms (YouTube, Twitch, Facebook, etc.) at the same time is easy. In this tutorial, you will get six ways to do that with detailed examples.
And we will cover things from open-source tools and free platforms for beginners to professional hardware and dedicated gear for gurus. Just have a look.
| Cost | Stability | Latency (high to low) | Easy to Use (hard to easy) | Network Stress (heavy to light) | Computer Stress (heavy to light) | |
| 1: OBS + Restream | 0 | ★★ | ★★ | ★★★ | ★★★★ | ★☆ |
| 2: OBS + RTMP Plugin | 0 | ★★ | ★★★★ | ★★ | ★★ | ★☆ |
| 3: OBS + MonaServer + FFmpeg | 0 | ★★★ | ★★★★ | ★ | ★★ | ★☆ |
| 4: OBS + Capture Card | ★★ | ★★★★ | ★★★★ | ★★ | ★★★☆ | ★★★★ |
| 5: OBS + NDI | 0 | ★★★★ | ★★★★ | ★★ | ★★ | ★★★ |
| 6: Hardware Encoder | ★★★ | ★★★★★ | ★★★★★ | ★★★★ | ★★☆ | ★★★★★ |
Preparations for Streaming to Multiple Platforms
Before start, you need to check a couple of things so the streaming will not go out of control.
1. Internet Condition
A sound and stable network condition ensure that your streaming will not be laggy or stuttering. At the same time, the bandwidth required for streaming is up to your output resolution and bitrate.
According to Twitch, the recommended bitrates for different video resolutions are:
- 6000 kbps – 1080P 60fps
- 4500 kbps – 1080P 30fps
- 4500 kbps – 720P 60fps
- 3000 kbps – 720P 30fps
Note that the above bitrate is for a single stream only. So, if you are pushing video to multiple platforms simultaneously using your internet bandwidth, the network load will increase several times.
2. Computer Performance
When streaming using software, the video encoding codec (X264, QSV, X265) rely heavily on hardware computing, which puts extra stress on your computer CPU or graphic card.
According to Intel, at least a four-core CPU and 8GB RAM are needed to play the game and stream it simultaneously because it takes about two cores for streaming. As you will put multiple streaming online, it’s better to get a more powerful desktop.
3. Streaming Software/Apps
Since OBS (Open Broadcaster Software) is one of the most popular free recording and streaming software, we will use it in our tutorial. You can download the software here.
After installation, we can do some initial streaming settings for:
- Platform account connection (Twitch, YouTube, Facebook, Restream, Twitter, and so on)
- Video bitrate
- Encoding algorithm (CPU Usage)
- Recording path, quality, format, etc.
- Audio setting
- Video resolution, FPS
- Operation hotkeys
If you are a new user of OBS, then make sure to test your stream before it goes live.
4. Patience
Yes, you have to be patient to tweak all the options or test connections or settings repeatedly until it works well for your multi-platform live plan. Sometimes it just stuck there, and you have to solve those issues that look unique in your case:
- Laggy stream video
- Computer overheating
- Connection drops
- App crashes
- Low video quality
If you are lucky enough to stream successfully for the first time, congratulations, but try to fix them patiently if you come across some problems. We have some FAQs at the bottom of this page, which might be helpful for you too.
As we have installed OBS into our computers, we can directly push the stream to YouTube, Twitch, Facebook, or many other platforms. But the problem is: we can only stream to one platform at one time.
To live our streams on multiple platforms, we will use OBS with other tools. Let’s dive into these solutions and examples.
Streaming Solution 1: OBS (Screen Capture) + Restream
Like OBS, Restream is another web-based platform for multistreaming. Any registered user can use it to push streams to multiple live platforms for free.
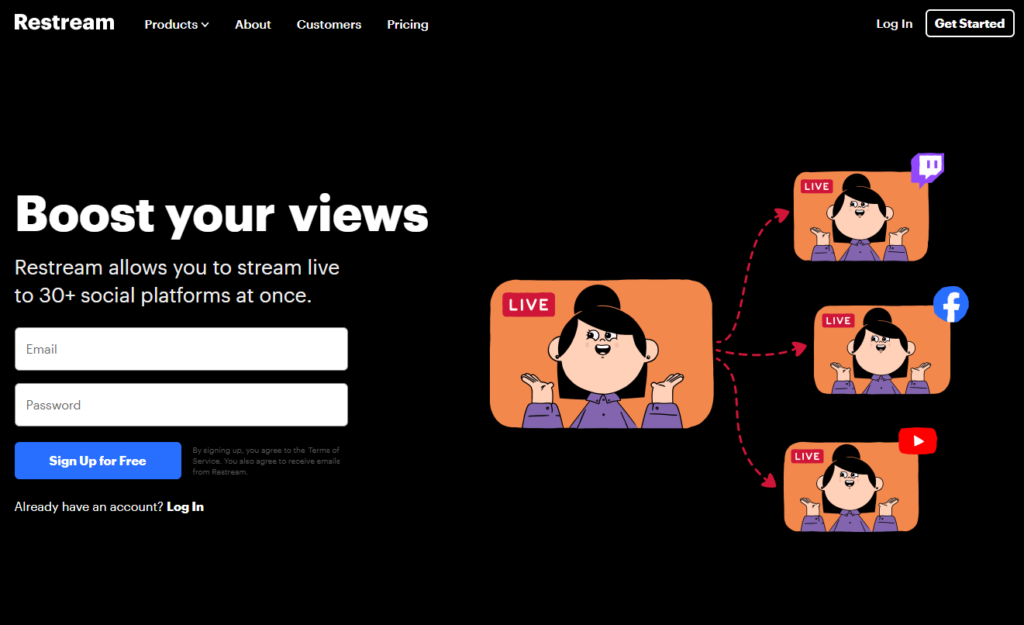
The logic is simple: we push our single stream from OBS to Restream, which distributes the incoming stream to the selected platforms simultaneously.
After registration, we can choose the target platform from the list and connect our streaming accounts to them easily:
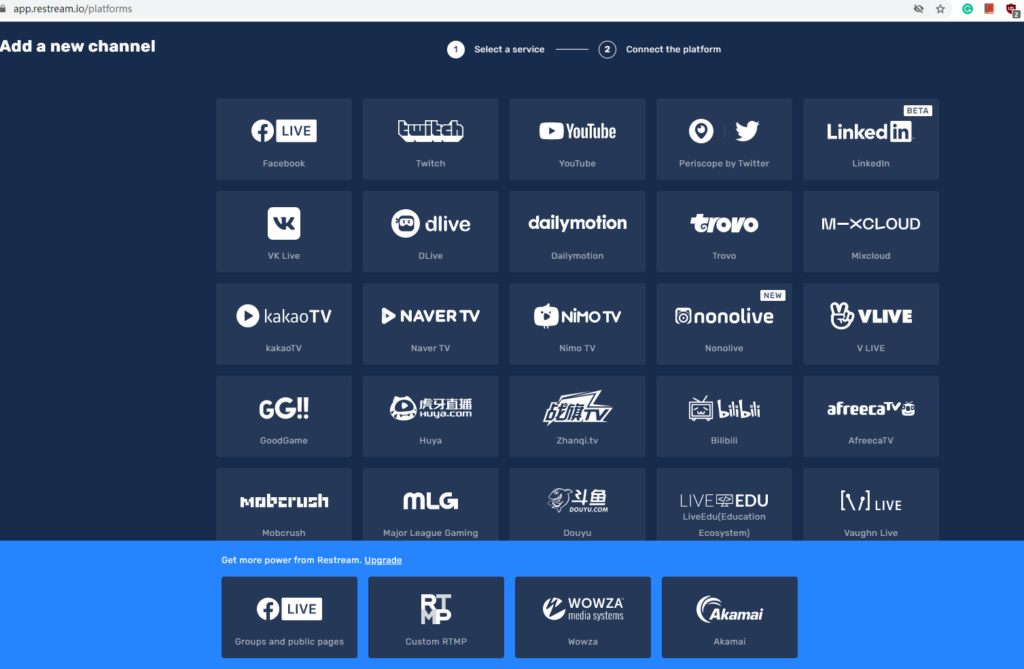
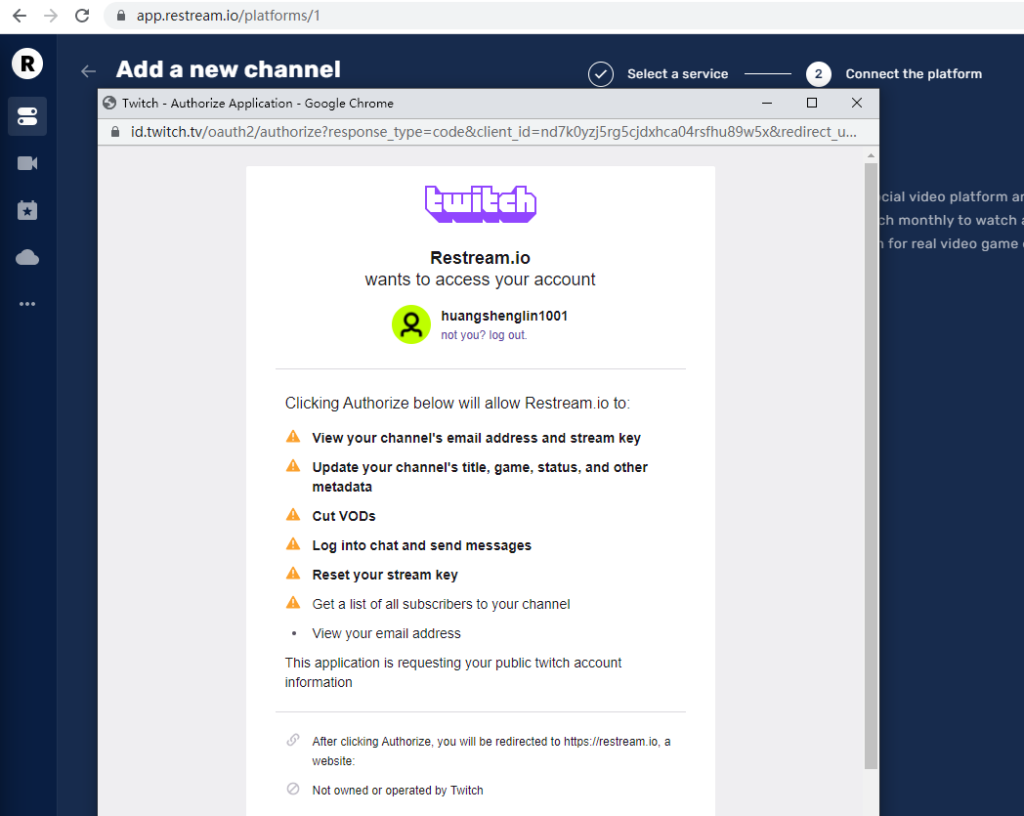
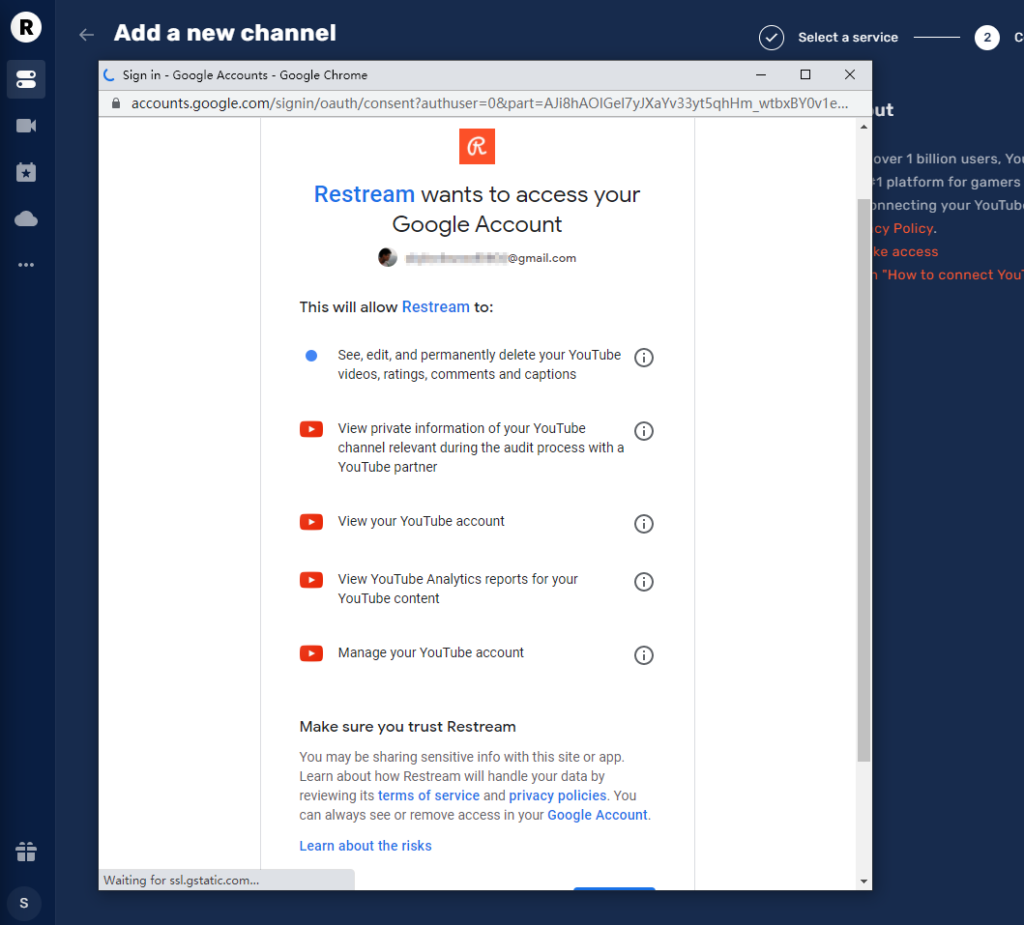
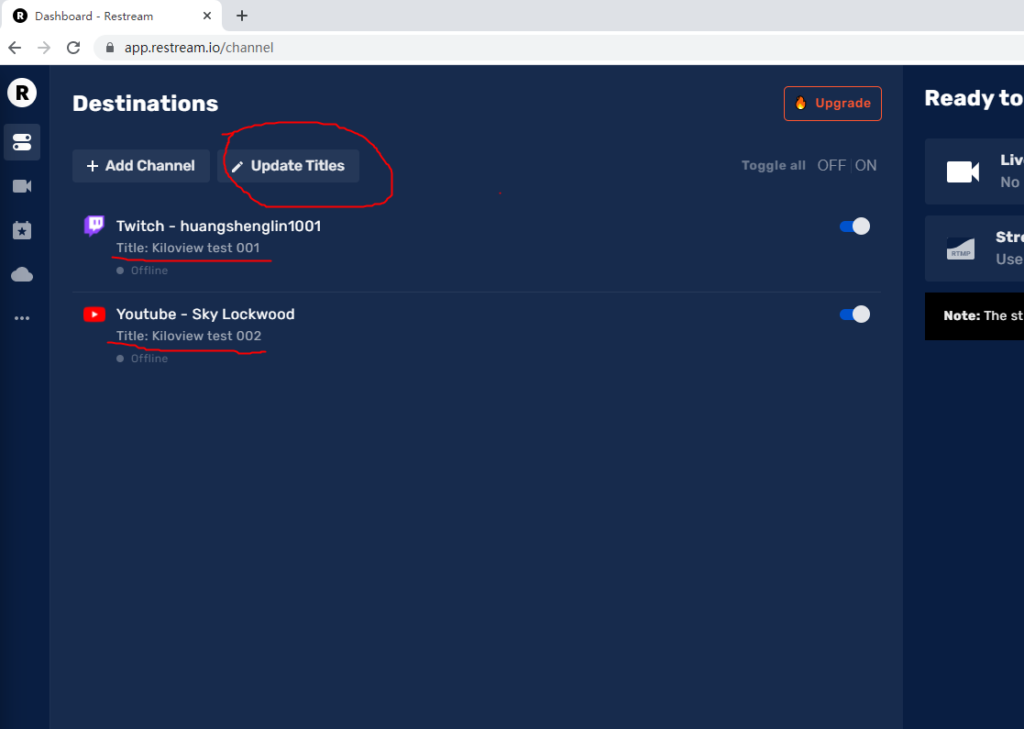
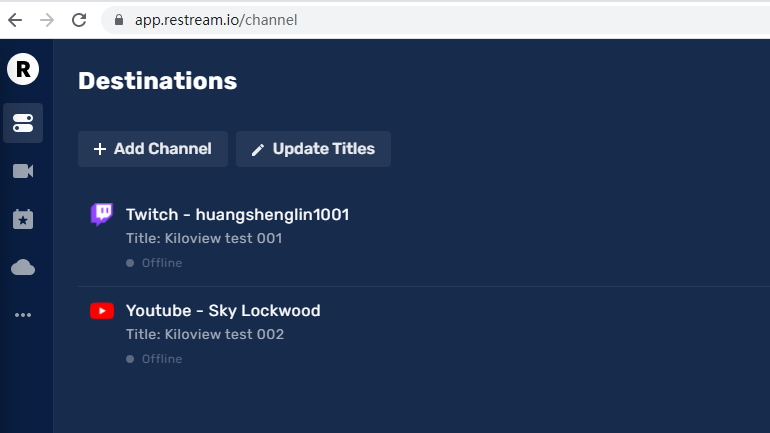
In this example, we have linked our Restream account to Twitch and Youtube by quick authorization:
As we finished the authorization, the two platforms are displaying on the left side with newly updated streaming titles (which your audiences will see):
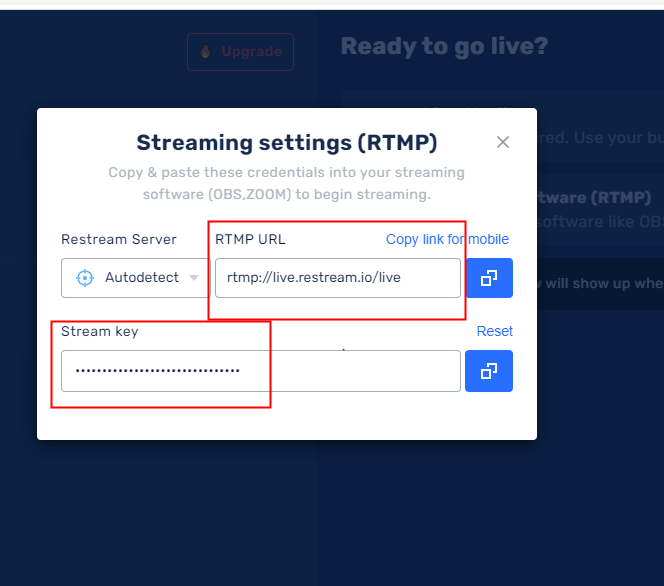
On the right side, we will follow the instruction (as showing below) and finish our OBS connection:

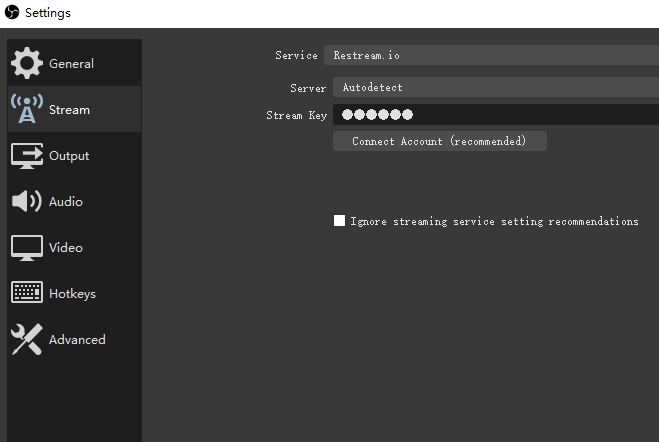
We will use RTMP URL in our OBS, so our video can get the correct streaming destination: Restream. Likewise, the encrypted stream key is essential for authentication also.
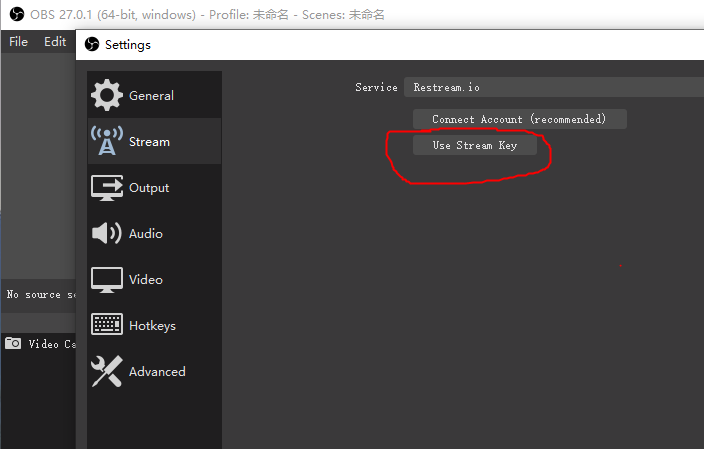
Now, we go to OBS, check “File” -> “Settings” -> “Stream” -> “Service” -> Select “Restream.io” -> “Use Stream Key”:
After pasting the stream key, hit the “Apply” button. As Restream is an OBS built-in option, we do not need to give the RTMP URL manually:
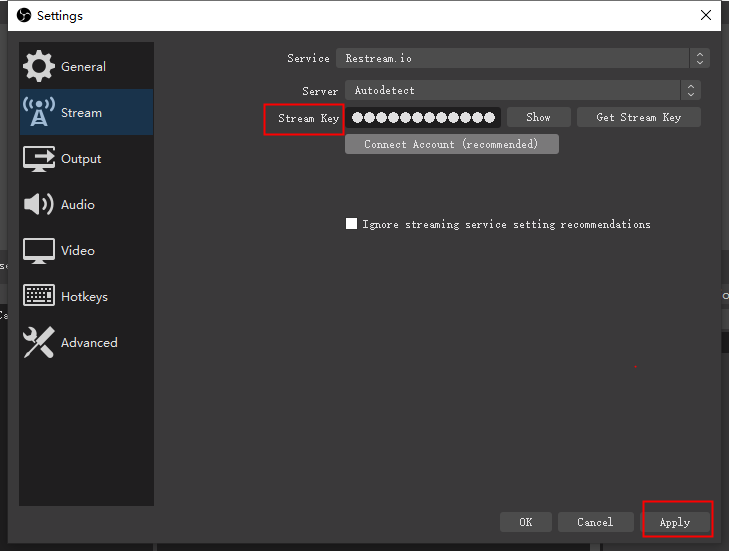
By the way, we can connect our Restream account to OBS instead of using the stream key.
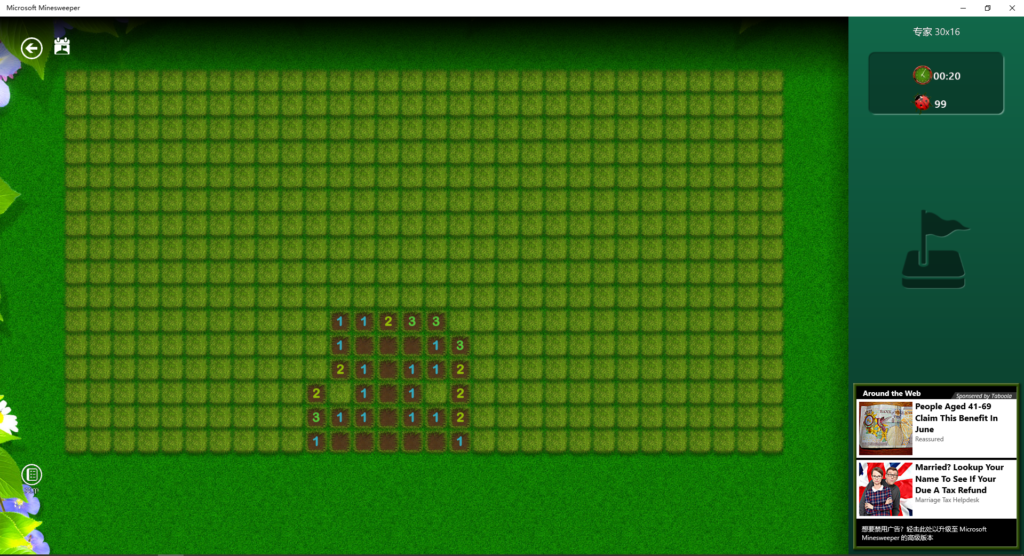
Now let’s launch a PC game to test out the stream from OBS to Restream. In this example, we have got Minesweeper:
Now open OBS, on the “Sources” panel, click “+” to add a new video source (if you can find the panel, then click “View” -> “Docks” -> “Sources”):
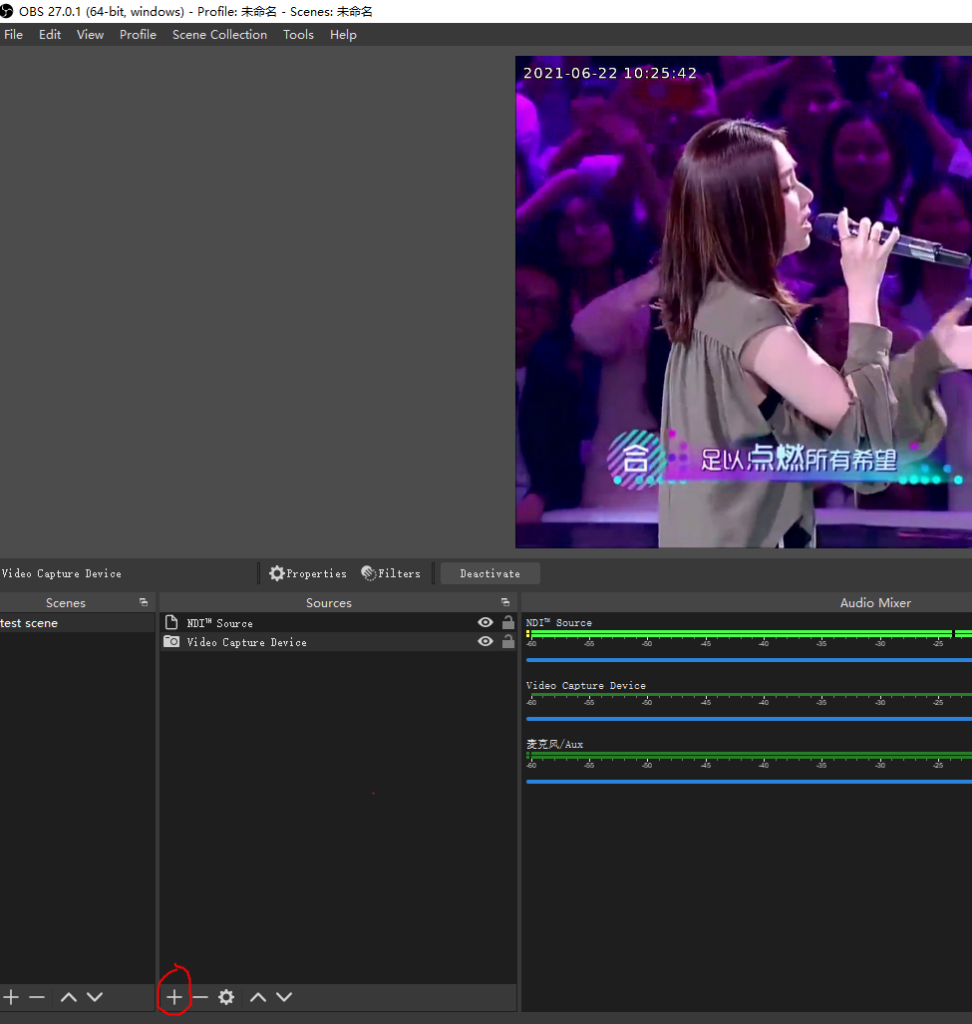
In the pop-up menu, we can choose either “Game capture” or “Display Capture”.
The major difference between these two options is: Game mode captures every full screen application, while display mode captures everything on your screen.
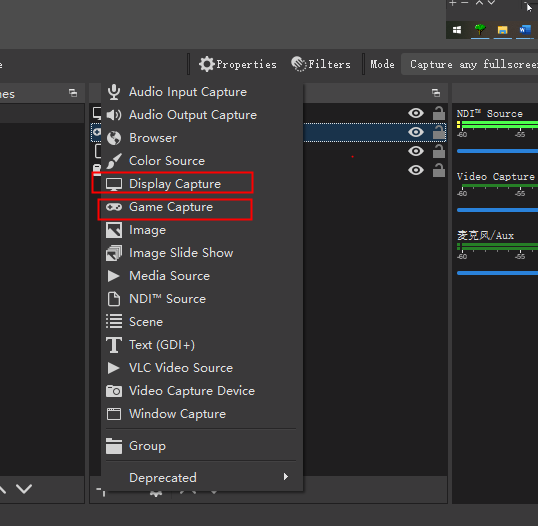
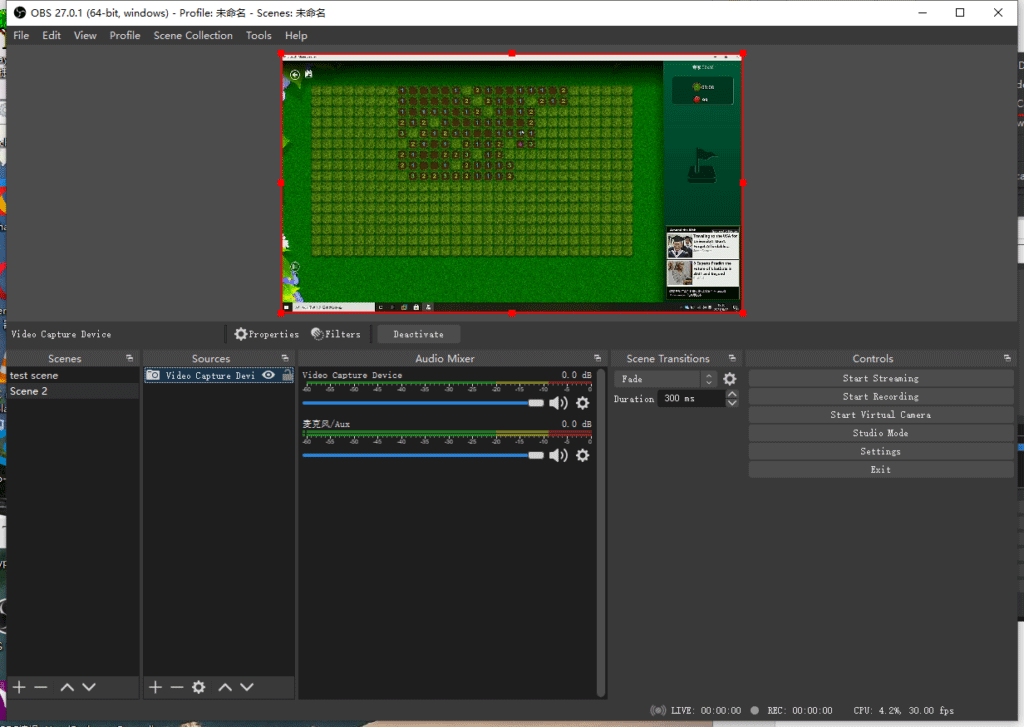
As our game (Minesweeper) can not be displayed on full-screen, we will use the “Display Capture” as the video source. After we created it, we can double click the option to get more settings:

Now we can see our screen capture is working on the preview area.
We can choose an overlay picture or more elements for our video stream also. Just add a new source, select “Image”, and choose the one we like (we dragged our logo in this example):
Now we can adjust the size and position of the overlay picture freely:
After everything looks good, we hit the button “Start Streaming” to go live:
Now back to Restream, we can see everything is on the go:
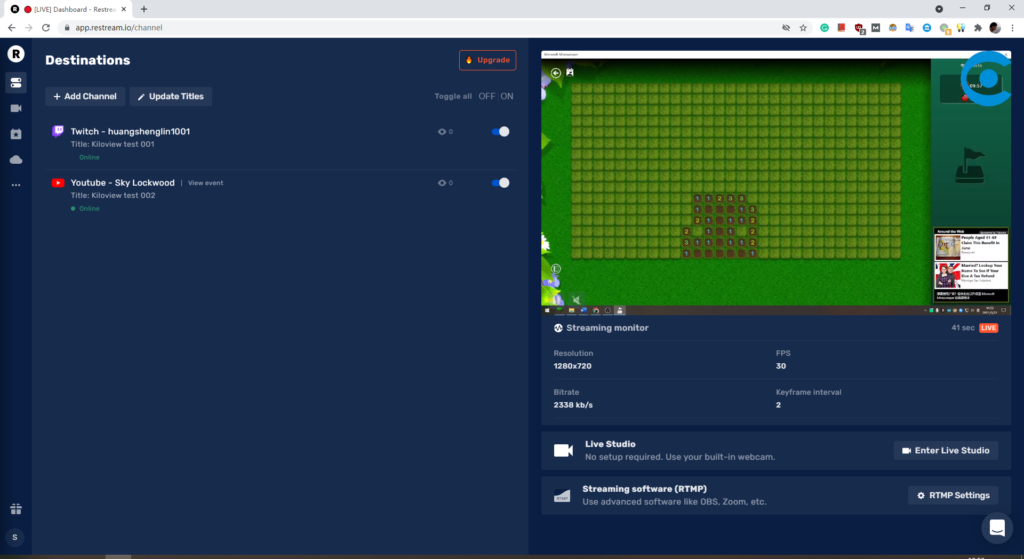
Our game goes live now, and the viewers can enjoy the live stream both on YouTube and Twitch.
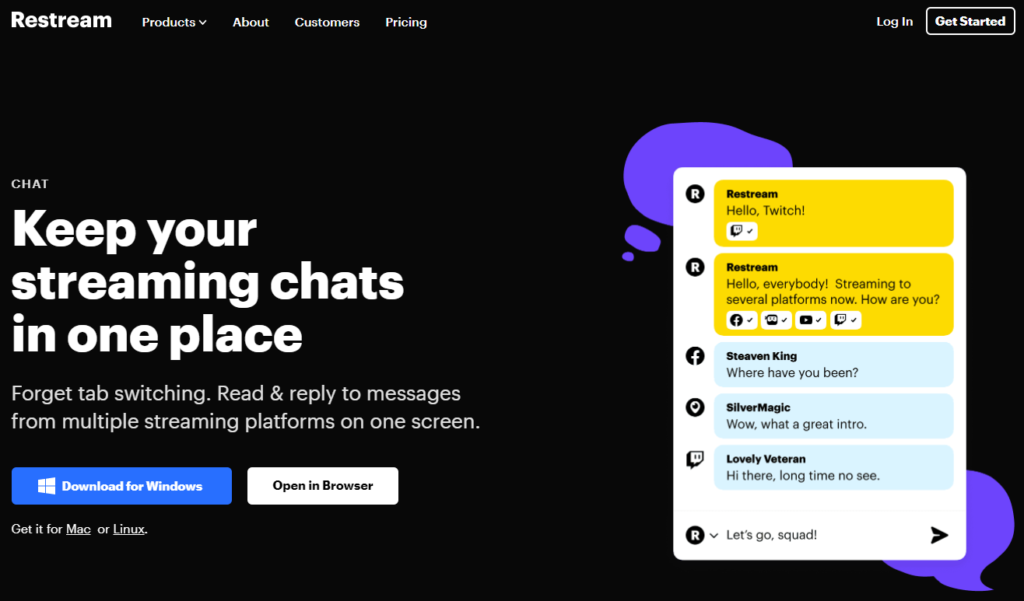
How about chatting with your audiences from different platforms? Download the official chat App to talk to them in one place:
Streaming Solution 2: OBS (Screen Capture) + Multi-RTMP Plugin
Restream is good enough for multi-platform streaming, but you may wonder if there is an integrated solution for doing everything just inside OBS. Here comes our “Multi-RTMP” plugin:
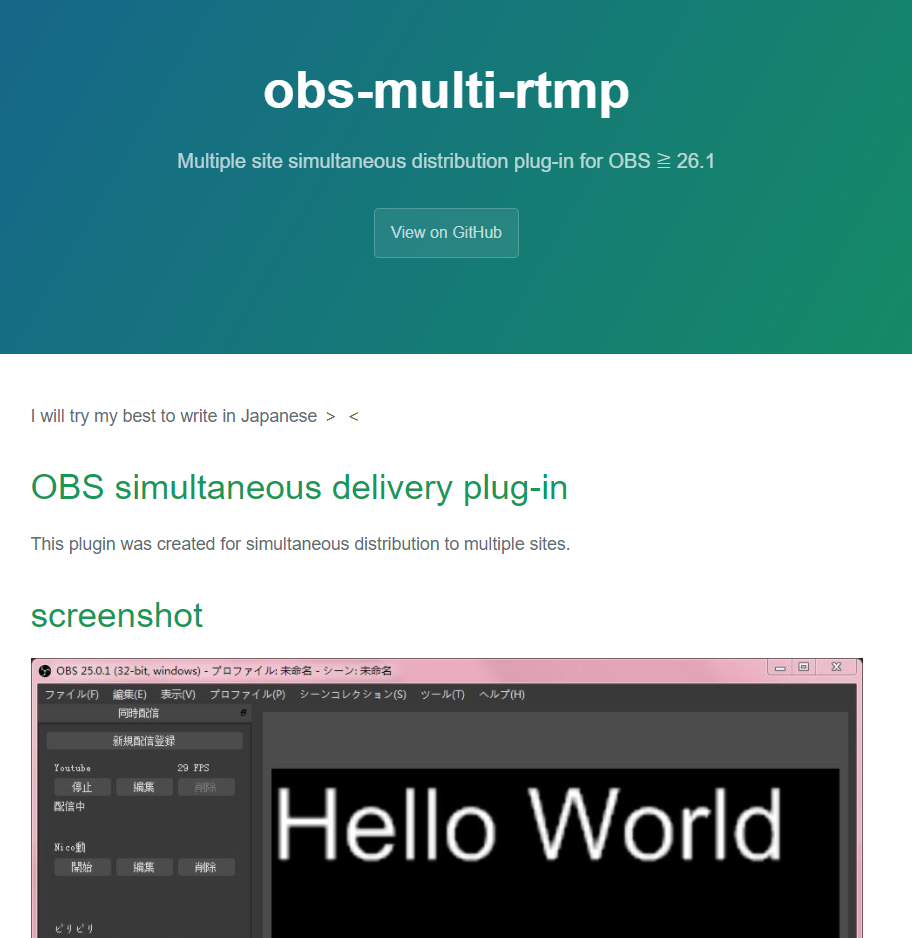
It is an open-source plugin for installing on OBS. When installed, we can push our stream to different live platforms using OBS.
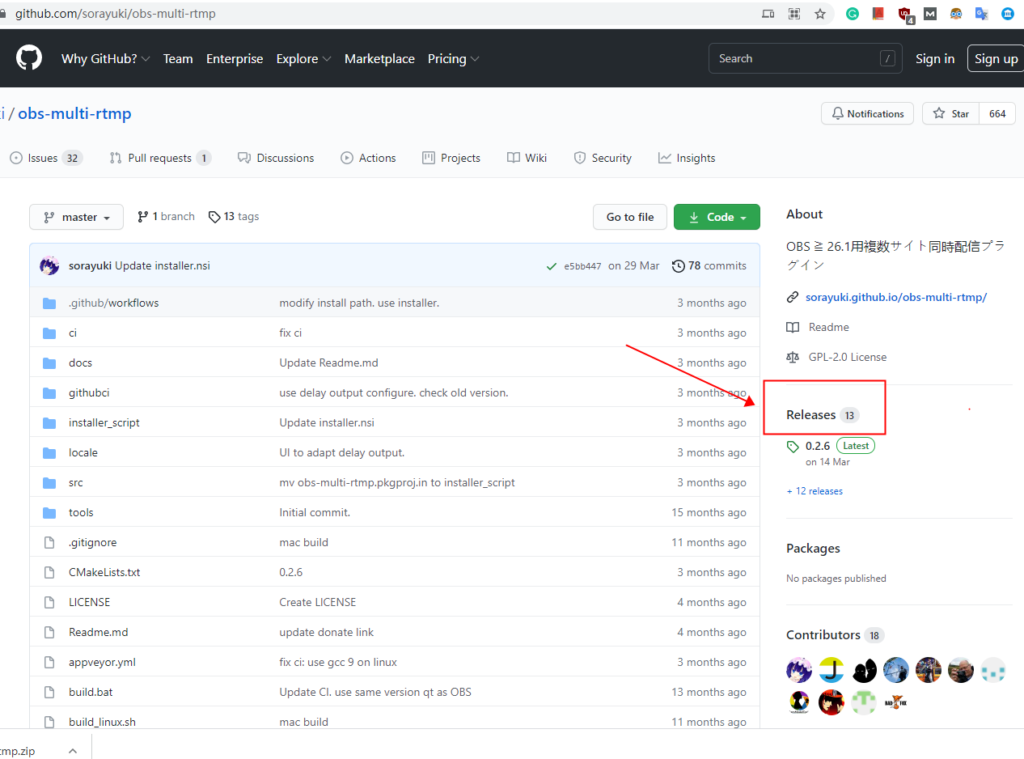
To begin with, let’s go to the Github page of Multi-RTMP here, and click on the releases panel to download the plugin file:
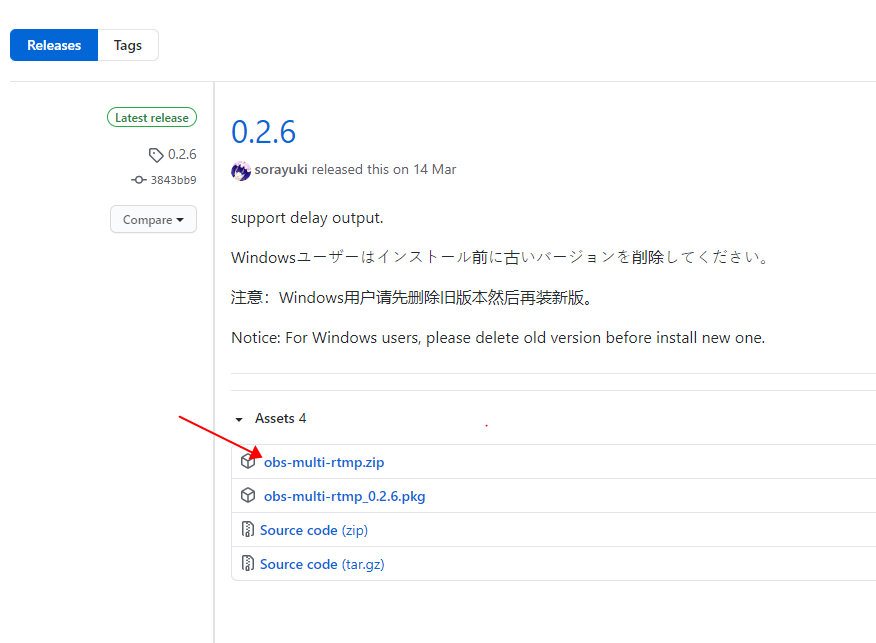
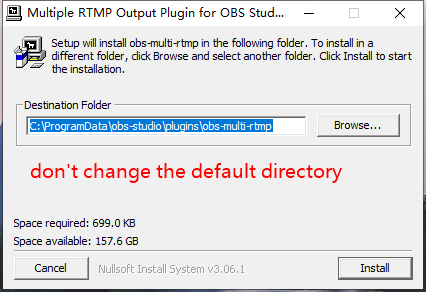
When finished download, we will click on the “obs-multi-rtmp-setup.exe” (Windows user) extracted from the zip file and run it. Remember not to change the default target folder: “C:\ProgramData\obs-studio\plugins\obs-multi-rtmp”.
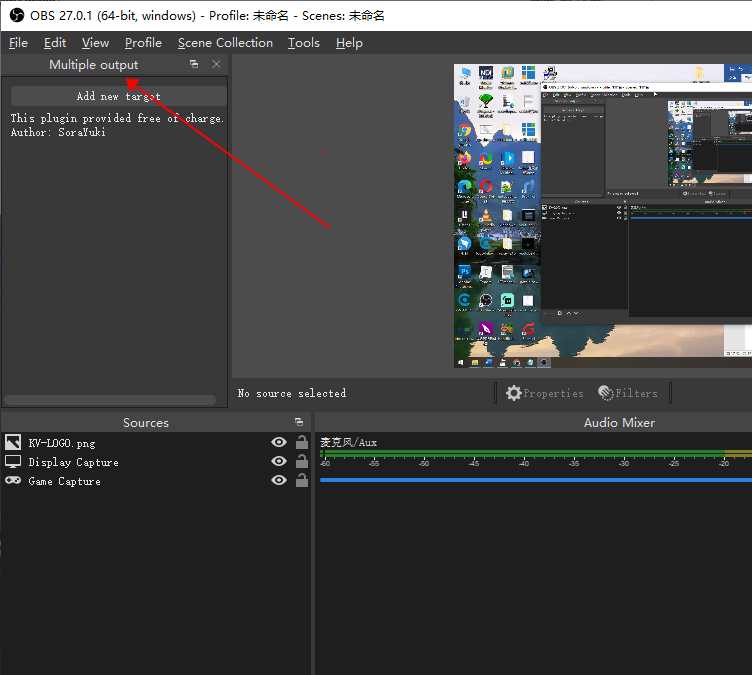
After installation and restarting OBS, you will find the “Multiple output” tab on the left side (if it doesn’t appear, check “View” -> “Docks” -> “Multiple output”):
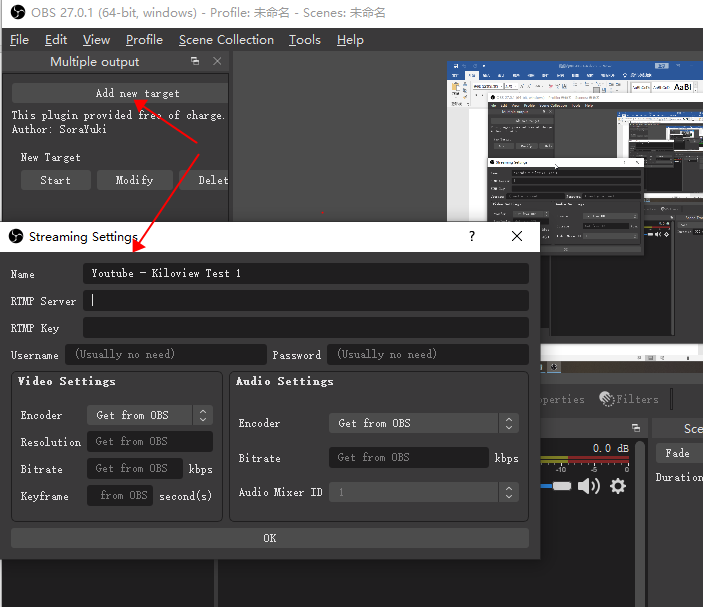
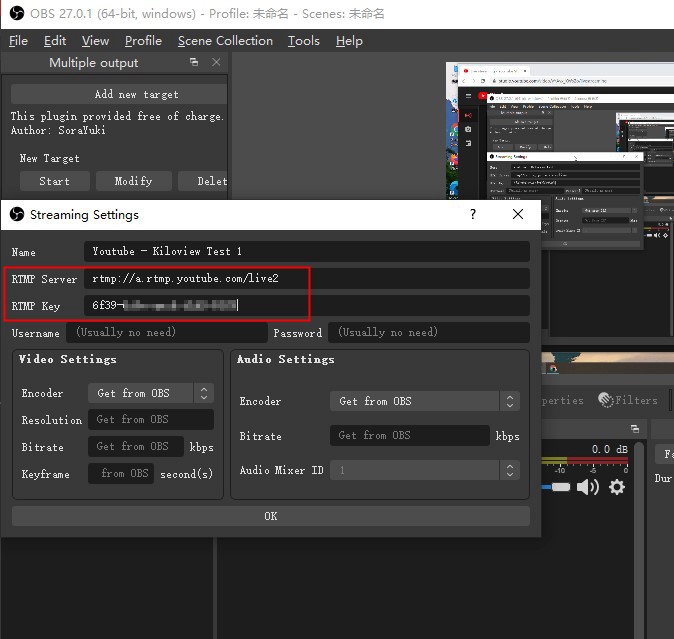
Now let’s add our platforms (Youtube and Twitch) by clicking the “Add new target” button inside the plugin panel:
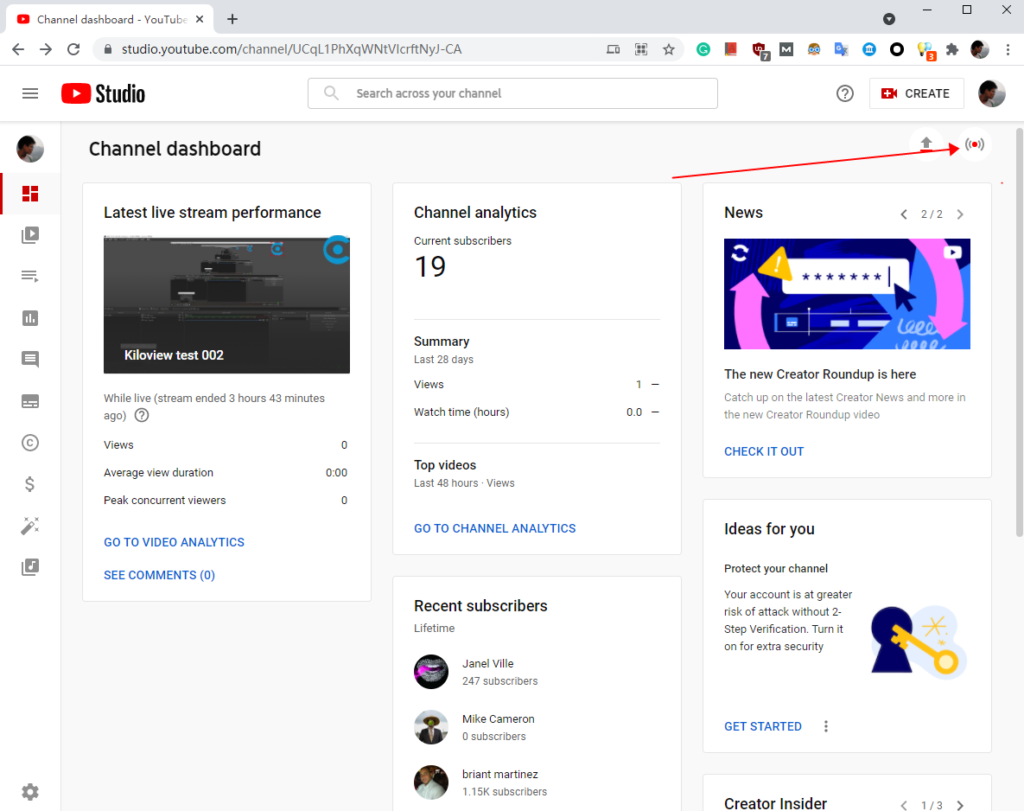
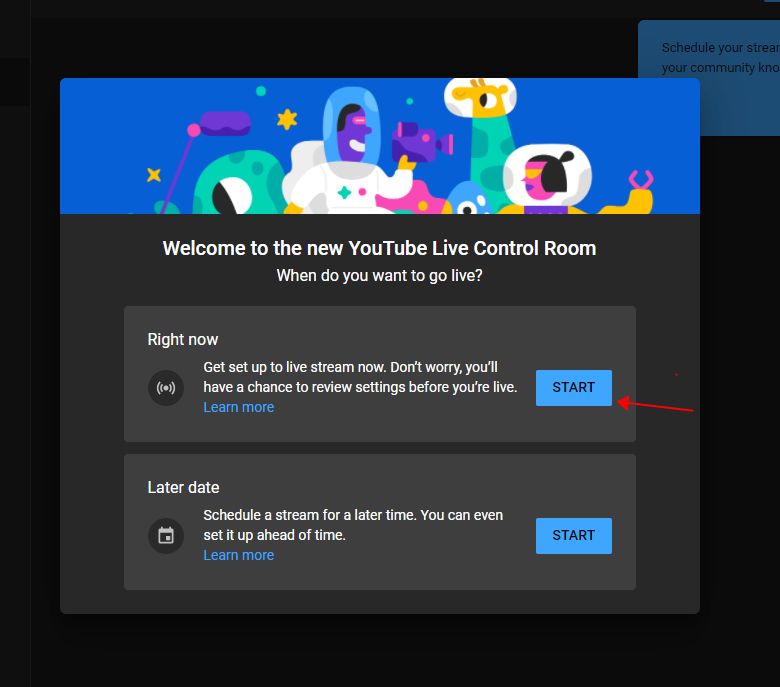
Then we will find the RTMP Server address and RTMP Key for our streaming platform (YouTube in this case). To do this, let’s go to Youtube Studio (https://studio.youtube.com/), and click on the “Go live” icon:
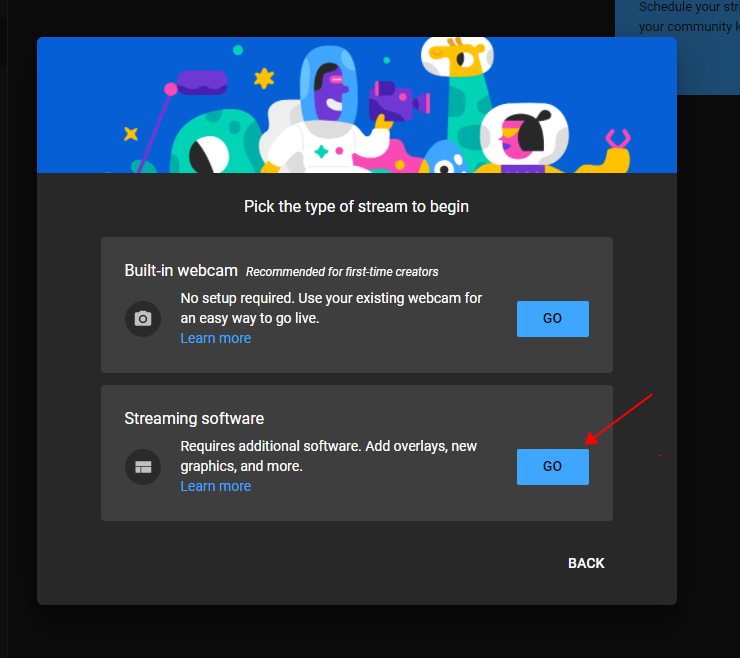
Now we check “Start” on “Right now” option and choose “Streaming software” on the following menu:
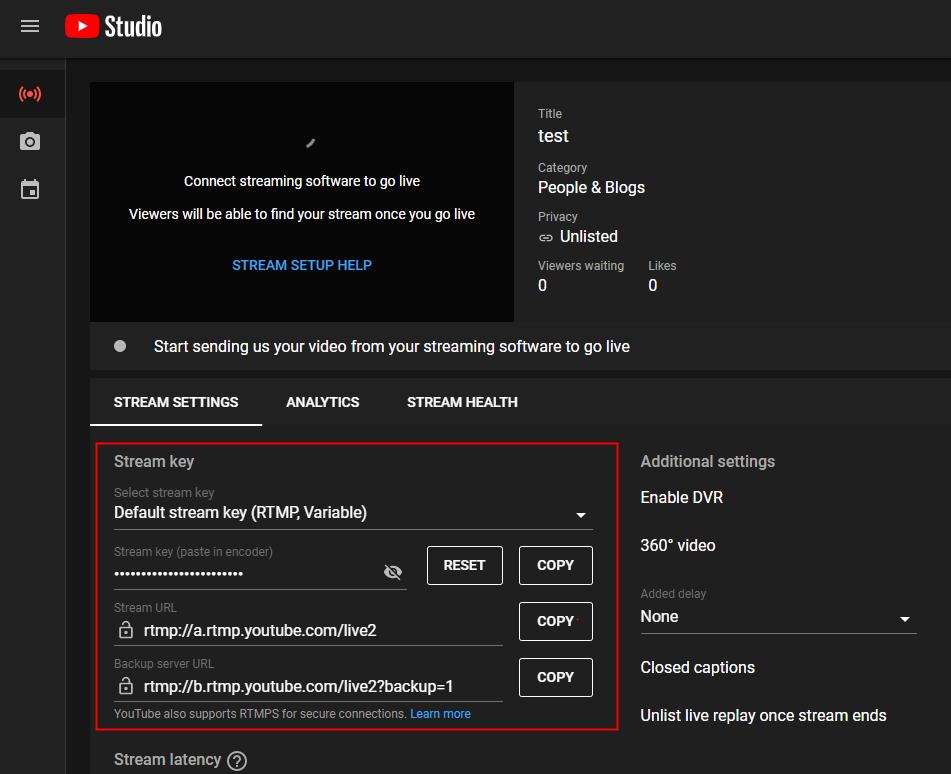
Now we copy the URL and stream key to the OBS plugin panel and click “OK” (leaving the other options as default):
Now let’s connect another platform, taking Twitch as an example:
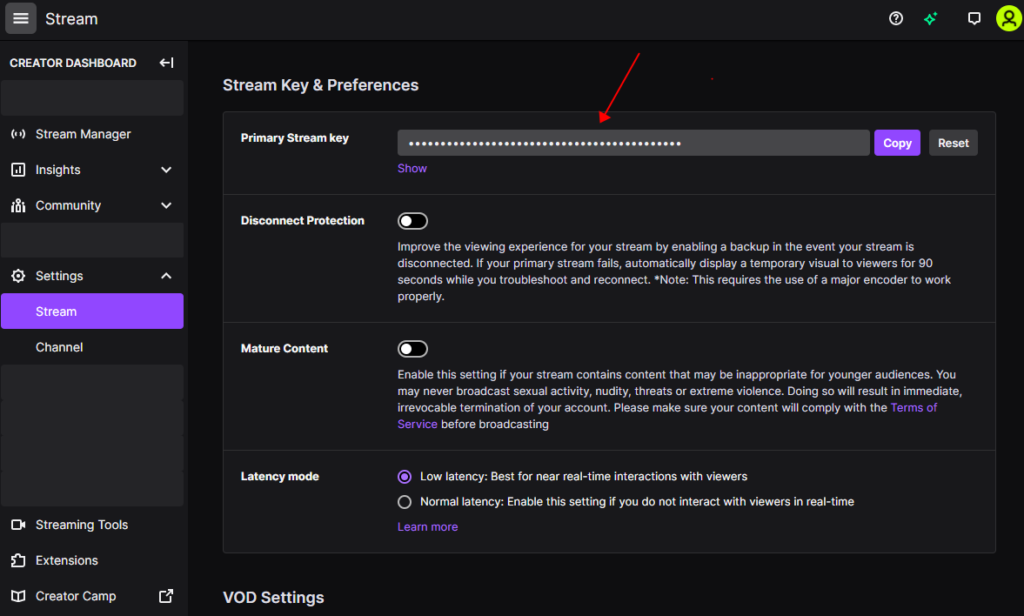
First, go to https://dashboard.twitch.tv/settings/stream. Once login, you will be redirected to the streaming setting detail, including your stream key:
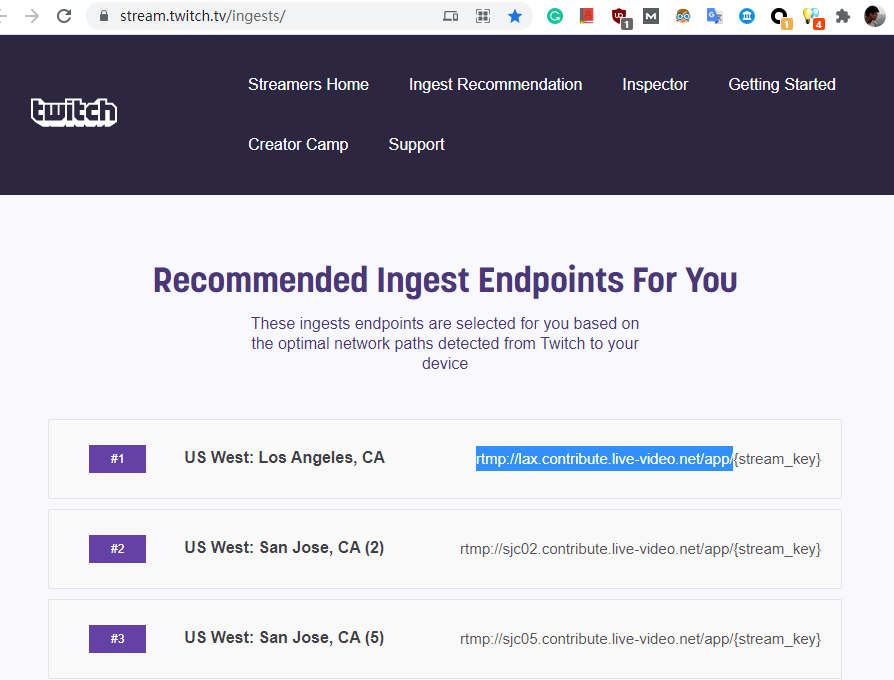
We need to go to the Twitch Streaming RTMP URL: https://stream.twitch.tv/ingests/, and it will auto-suggest some servers according to our location. All we need to do now is to copy any of the recommended URLs (be careful not to cover the variable after the tailing slash):
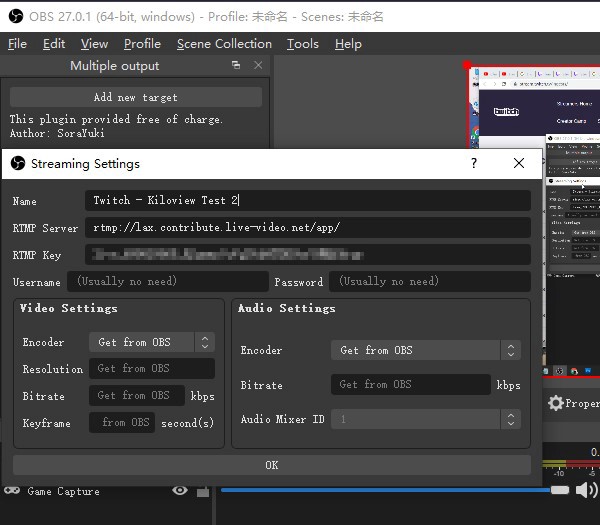
When we finished copying the RTMP server and RTMP key into the OBS plugin panel, click OK.
Just like before, our video will go live both on Youtube and on Twitch if we click the button “start streaming” on OBS.
Streaming Solution 3: OBS (Screen Capture) + Self-host Server + FFmpeg Directives
When we stream to Youtube, Twitch, Facebook, or Restream, we are pushing our videos to their RTMP servers. How about put our stream to our own server and then distribute it across those platforms?
Here we can establish an RTMP server on our computer and stream via FFmpeg directives from our computer.
There are three essential tools we need for this:
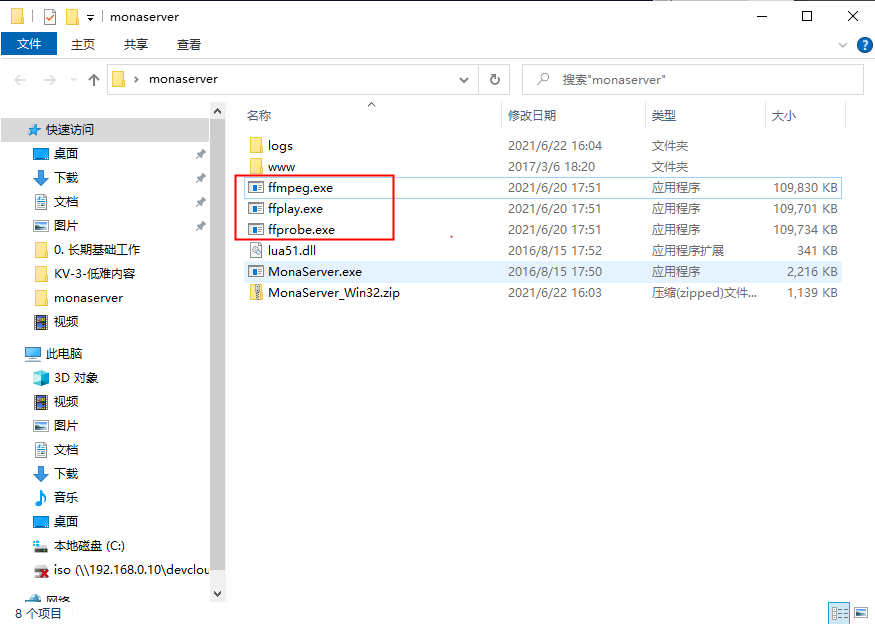
- MonaServer. MonaServer is a free and portable RTMP server that can run on our computers (so we will send our stream to it from OBS). The compiled exe file can be downloaded here;
- VLC Media Player. The player is used to test our local stream video. Any apps that play RTMP stream will fit. You can download VLC on their official website here;
- FFmpeg. FFmpeg is a free and powerful tool to resend our stream from our local RTMP server to final destinations (Youtube, Facebook, Twitch, and so on). You can download FFmpeg on their official website here;
When finished downloading, make sure the extracted FFmpeg exe files (ffmpeg.exe, ffplay.exe, and ffprobe.exe) are moved to the root directory of MonaServer, so the working directory looks like this:
Now let’s start our streaming journey.
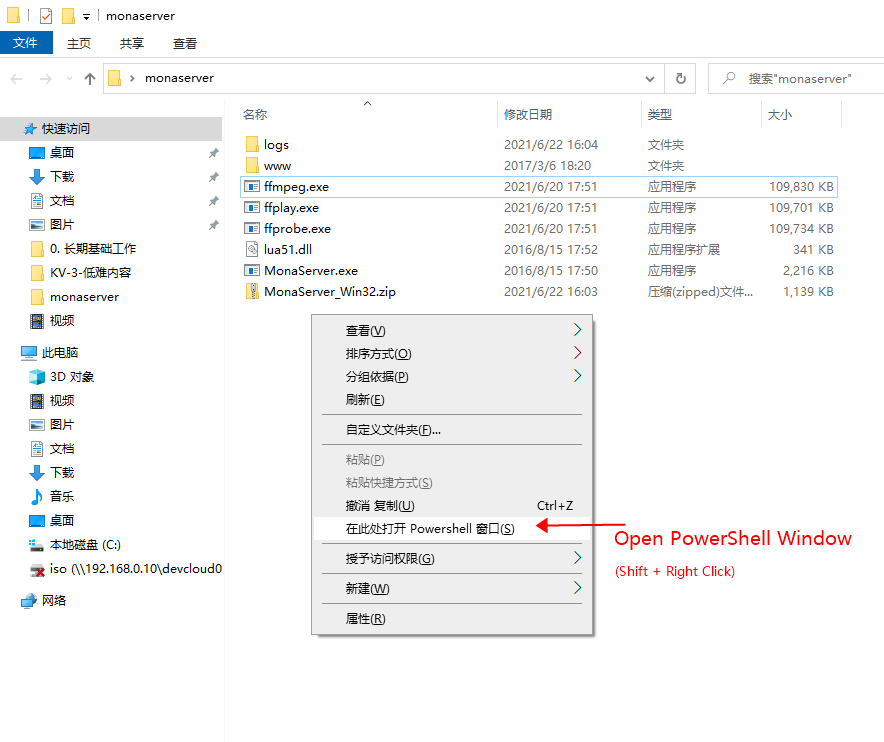
First, open MonaServer directory, hold the “Shift” key, and right-click on the blank area, choose “open PowerShell window here”:
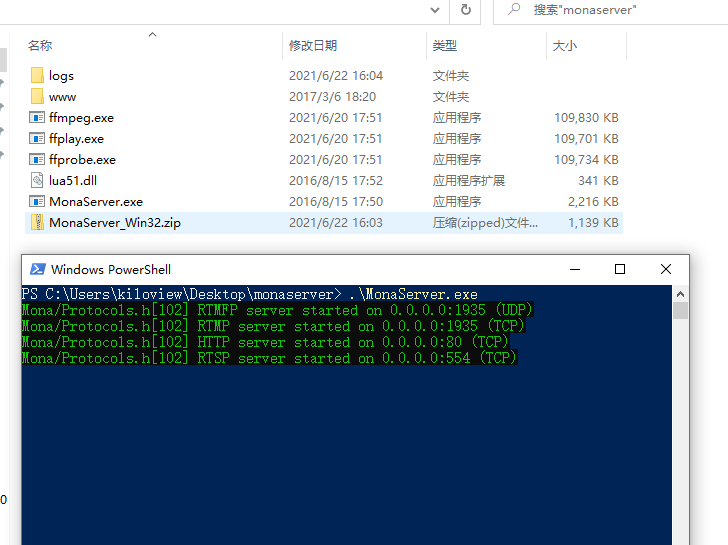
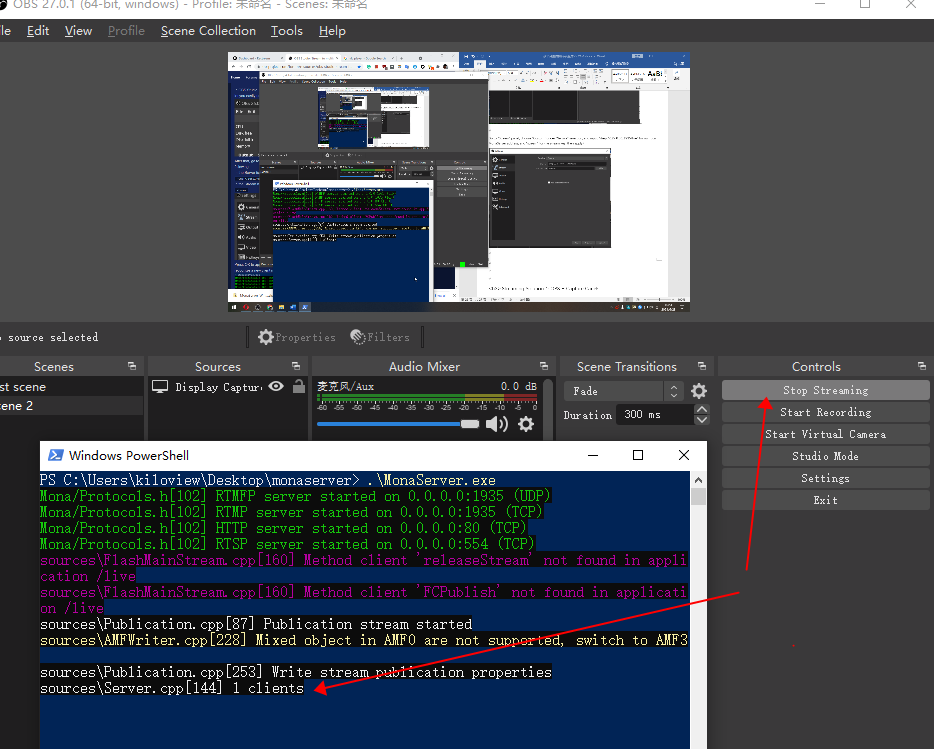
When the Windows PowerShell poops out, input “.\MonaServer.exe”, press enter, then you will find the server running info:
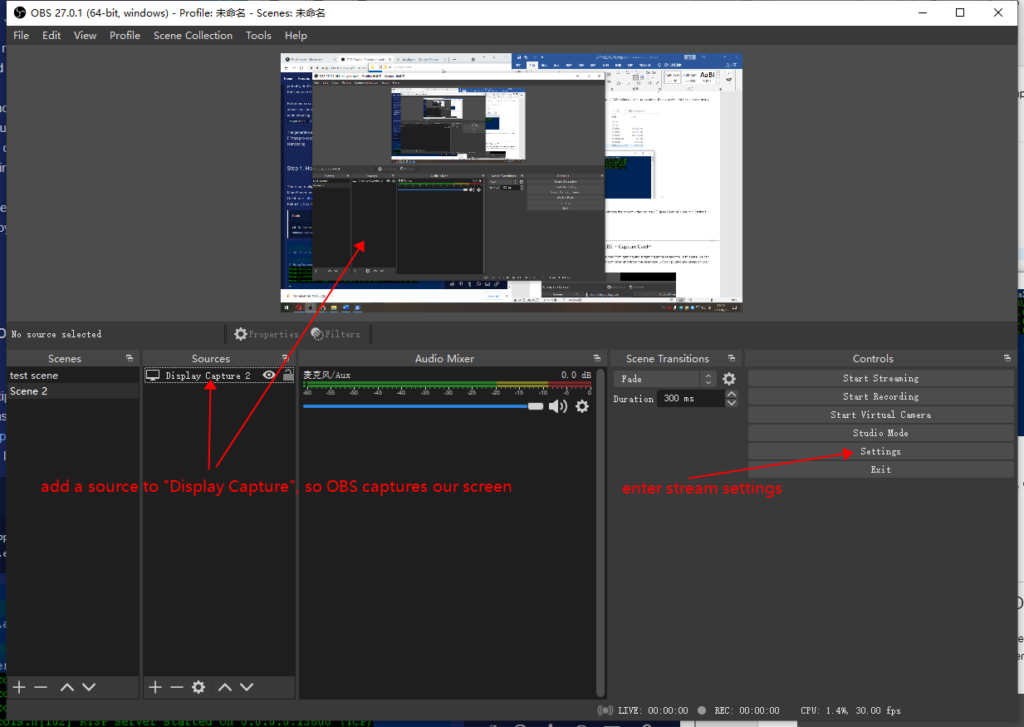
As the service is running, now we go to OBS, choose the correct video source (“Display Capture”), and hit “Settings”:
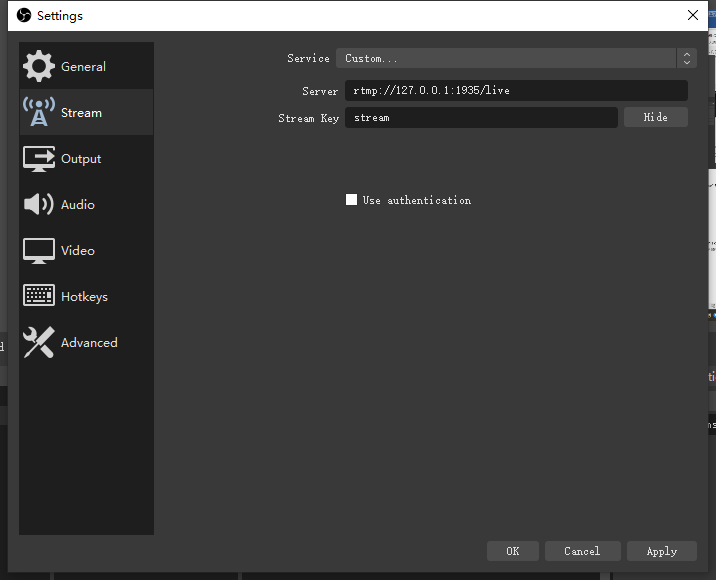
Go to the “Stream” panel, choose “Custom” under “Service” selection, and input “rtmp://127.0.0.1:1935/live” for our local MonaServer address, and “stream” for the stream key, then apply:
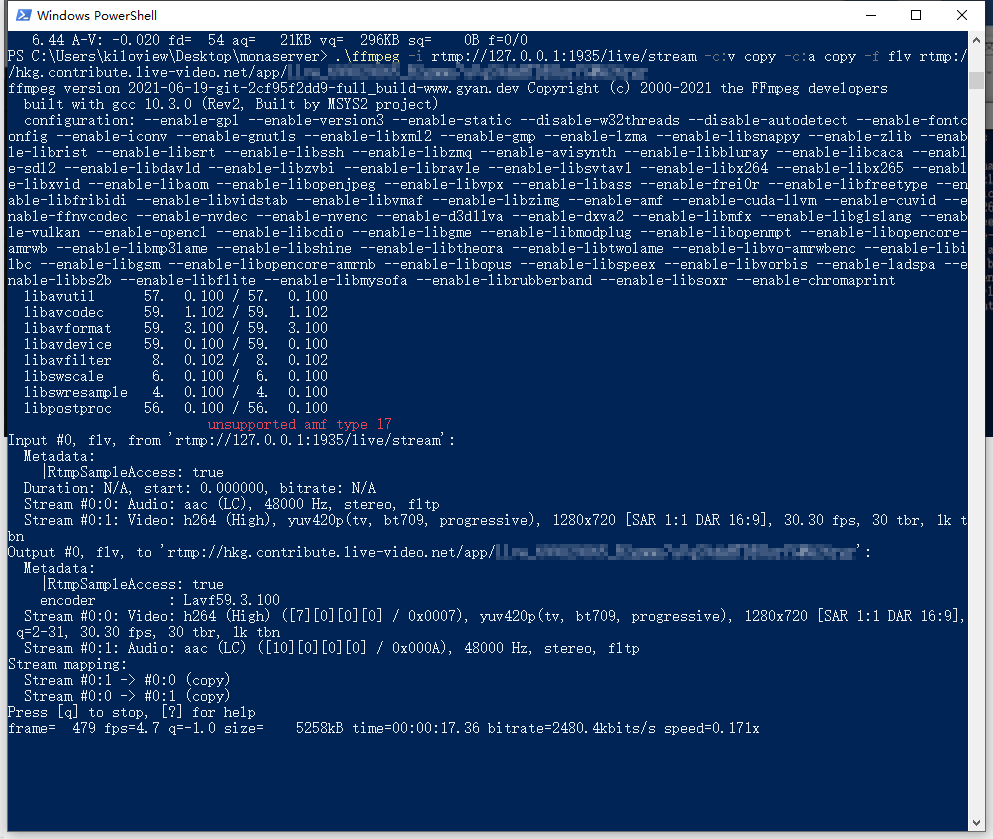
Now back to OBS, hit the “Start Streaming”. We will see the status in the PowerShell changed immediately, which tells us it’s getting the stream from some client (just ignore the error info):
Now our local server is working properly on the live stream. To test it, open the VLC Media Player, press “Ctrl + N” to open a network stream, and put our local stream URL (rtmp://127.0.0.1:1935/live/stream) to it:
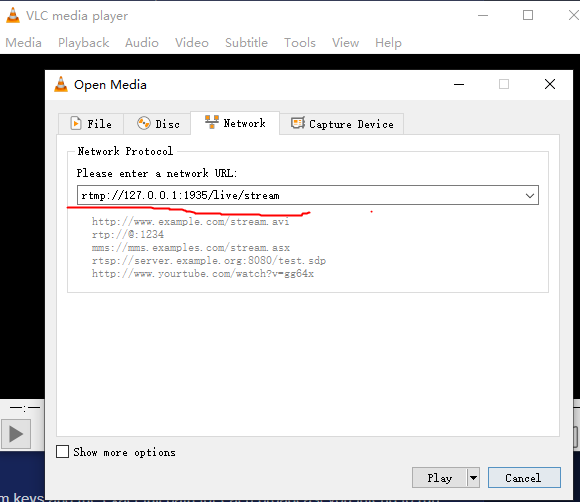
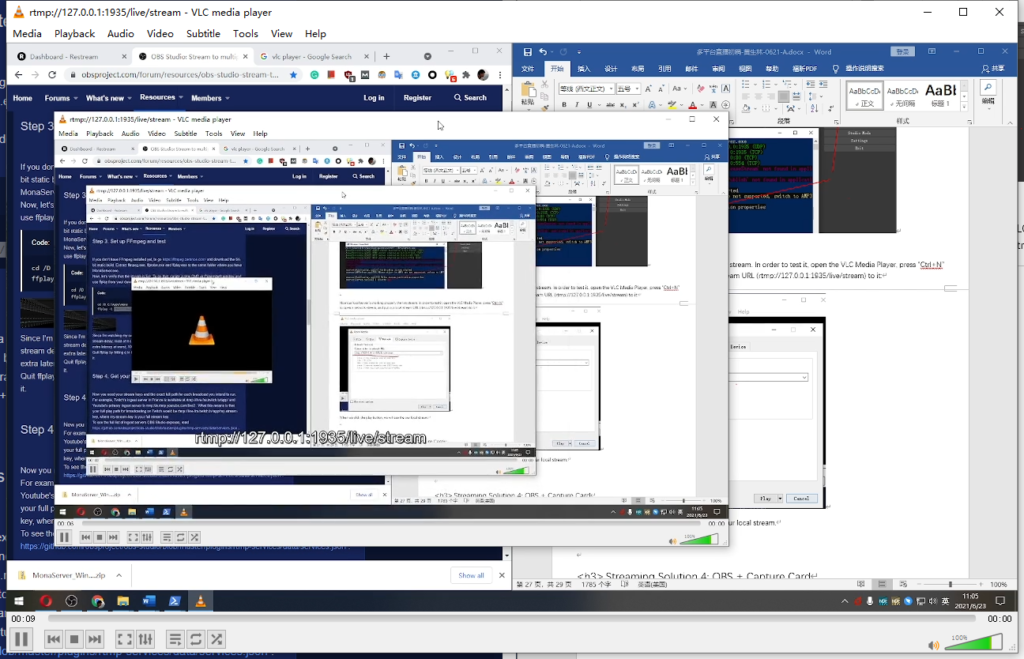
When we click the play button, we will see our local stream:
Next, we will put our local stream to more Internet platforms such as YouTube and Twitch via FFmpeg. Let’s go back to the local server directory and open another PowerShell window from there by Shift + Right Click.
We will put our local stream to a single platform to test first. Let’s input the following code into the new PowerShell console:
ffmpeg -i rtmp://127.0.0.1:1935/live/stream -c:v copy -c:a copy -f flv rtmp://hkg.contribute.live-video.net/app/{stream_key}Remember to put your RTMP URL and stream key in the PowerShell:
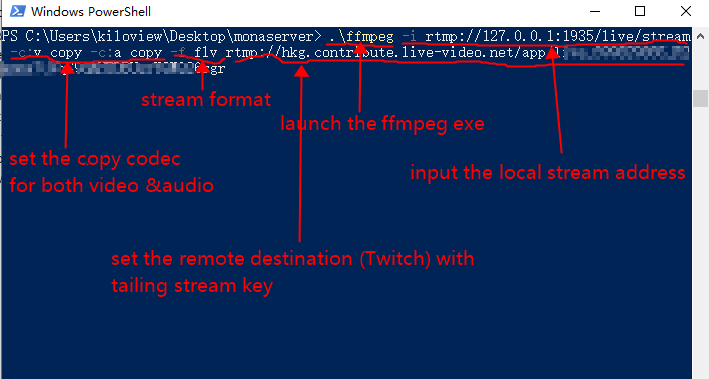
If you have problems getting your streaming URL (remote destination RTMP URL address) and stream key, please refer to relevant content in our streaming solution 2 above.
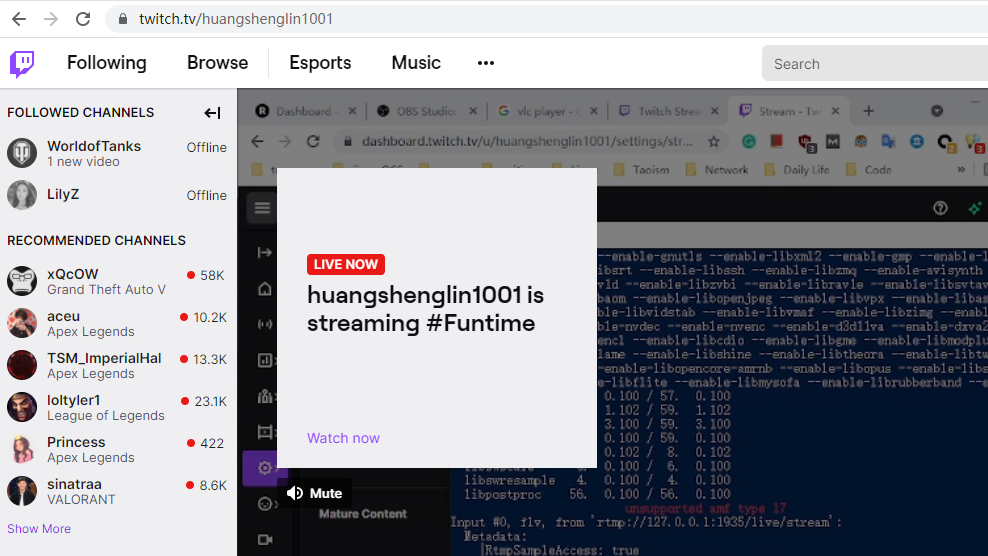
When we hit enter, the console starts working, and we will see our streaming status in the Twitch web console:
Now let’s use the FFmpeg directive to stream our video to Youtube and Twitch (and any other platforms) at the same time.
Open another PowerShell window from the MonaServer directory, and type the following code:
ffmpeg -i rtmp://127.0.0.1:1935/live/stream -c:v copy -c:a copy -map 0 -f tee "[f=flv]rtmp://hkg.contribute.live-video.net/app/{stream_key}|[f=flv]rtmp://a.rtmp.youtube.com/live2/{stream_key}"exchange the above RTMP URLs and streams key with your own and you will get the local stream over two platforms.
For more useful examples or operation references, you can find here on the OBS official platform.
Streaming Solution 4: OBS + Capture Card
Sometimes your computer is getting overwhelmed from gaming and streaming at the same time. In this case, we can use a video capture card installed on another computer and finish the streaming without putting any stress on your gaming PC.
In the following example, we will use two computers:
- Computer A: Streaming PC, OBS and capture card hardware installed
- Computer B: Gaming PC, outputting game video to computer A as media source
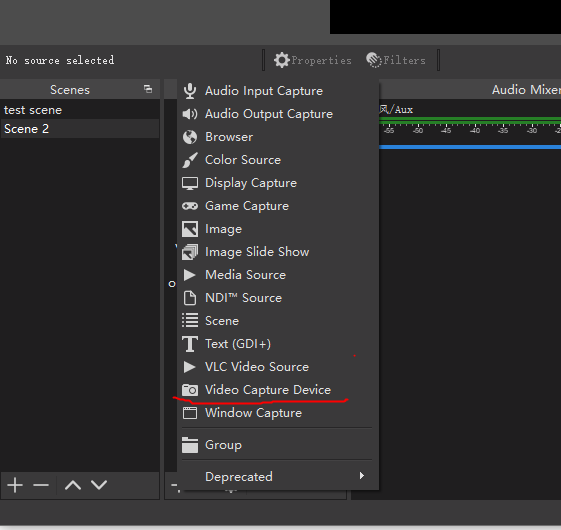
In Computer A, we will add a new source to “Video Capture Device” on OBS and select our capture card:
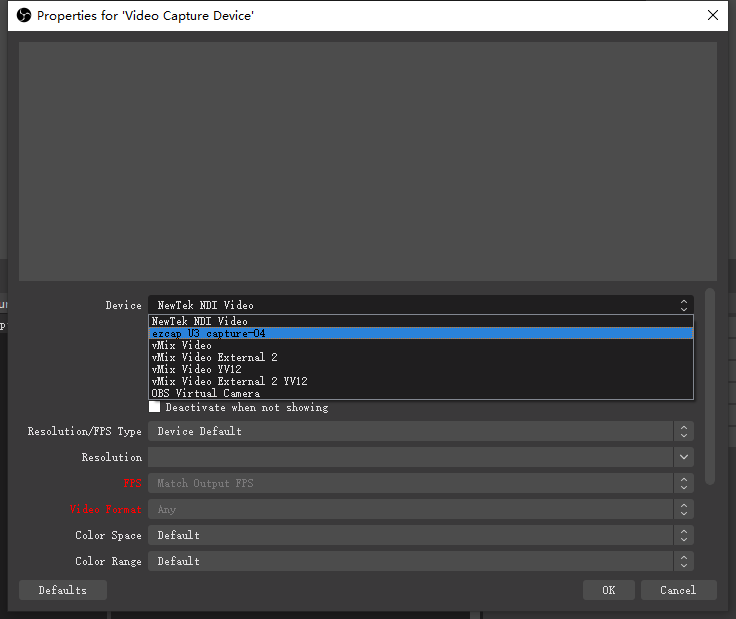
Once targeted our capture device, the gaming video appears automatically on the preview window:
Next, we will stream to Restream.io or Multi-RTMP plugin to finish the multi-platform distribution, just as we covered above.
Streaming Solution 5: OBS (External Video Source) + NDI
Have a slow computer and no budget for capture device? No worry, we can collect the video source via some free capture Apps (for example, NDI Screen Capture).
NDI is a professional video transmission protocol launched by NewTek, which empowers us to autodetect video sources across the local network (e.g., other computer’s screen capture). In other words, NDI works as a perfect virtual capture card.
To begin with, let’s download the NDI tools from the official website here:

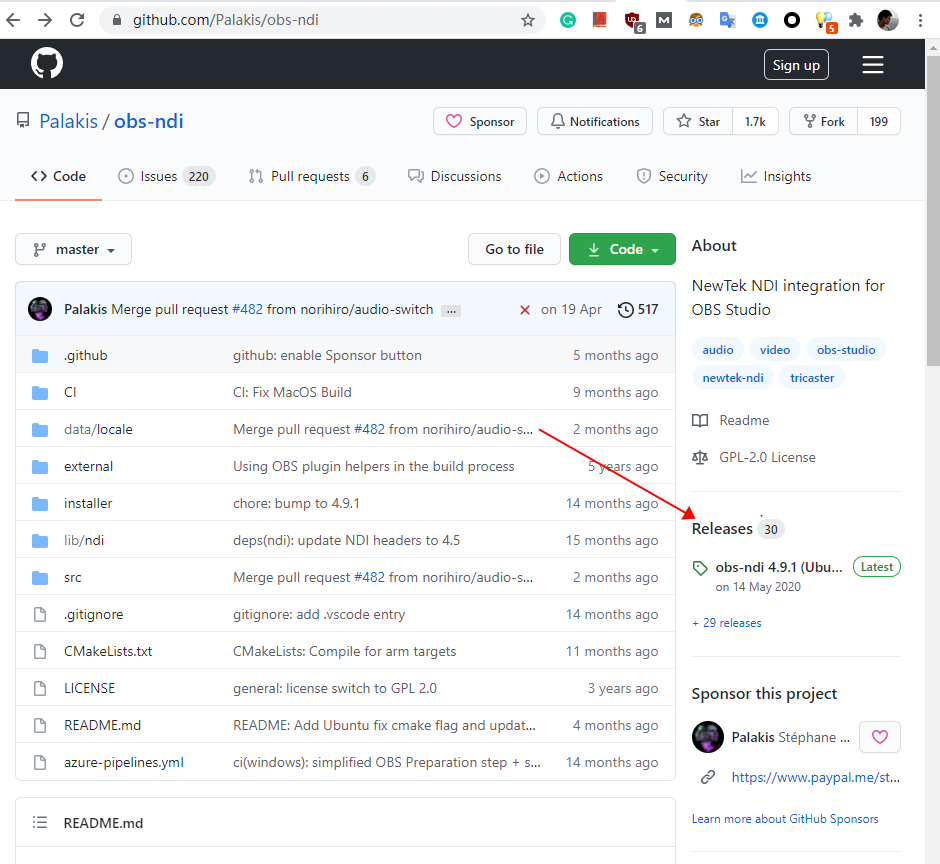
Meanwhile, we need to install an OBS plugin to make sure that it detects NDI video sources. We can download the opensource tool (obs-ndi) from Github here:
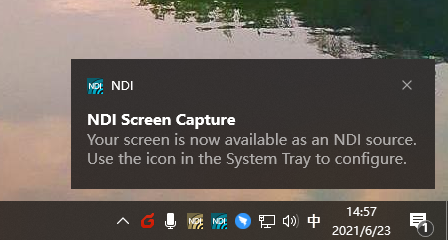
Once we launched our game, run the “Screen Capture” from NDI Tools. After that, our gaming screen will be a video source and is ready to be discovered automatically.
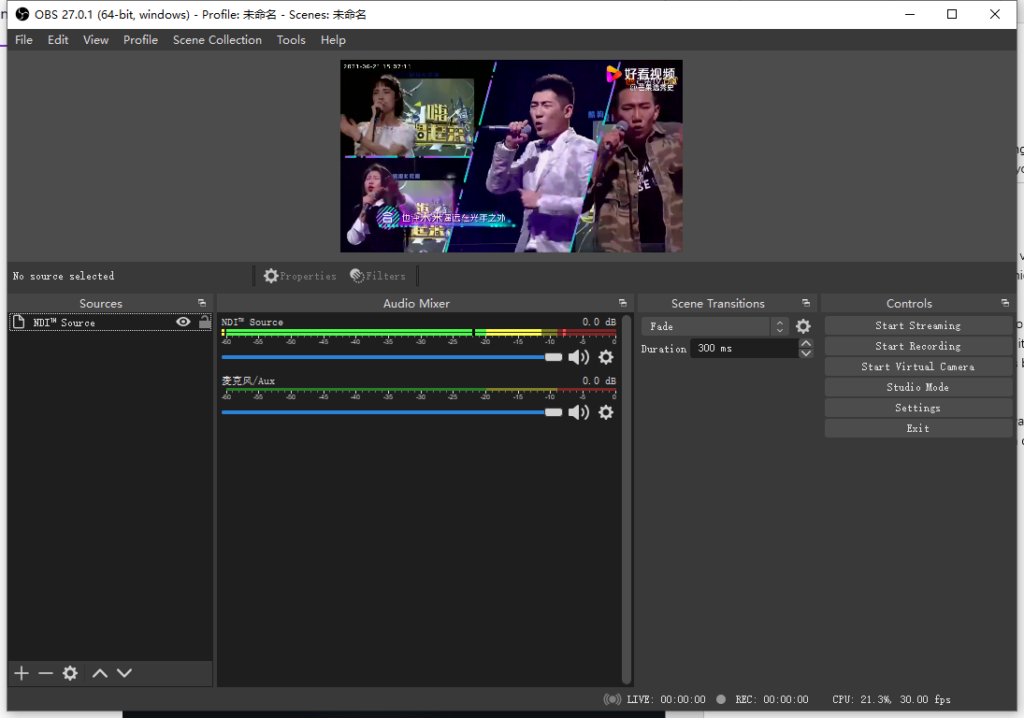
Next, we can capture the video on any computer that is in the same network. We will open OBS in that computer and add an NDI source (the one we put before):
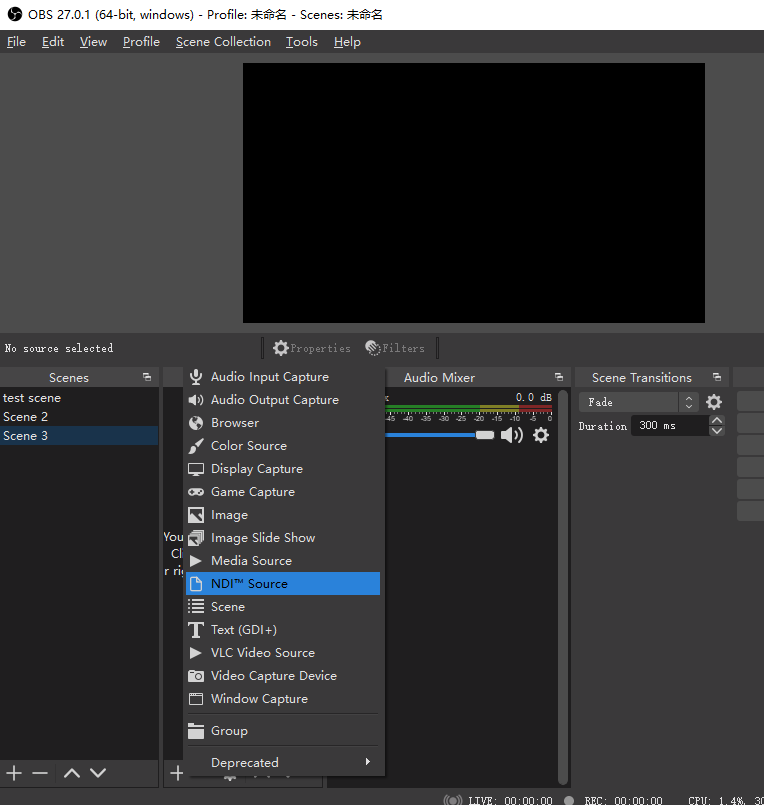

If you can find the “NDI Source” option, try to install the obs-ndi plugin again.
Now that we have captured the video from NDI, let’s stream it to Facebook, Twitch, and Facebook through OBS. We will stream to Restream.io or Multi-RTMP plugin to finish the multi-platform distribution, just as we covered above:
Streaming Solution 6: Hardware Encoder + Integrated Console
OBS slows down your computer, and the stream settings sometimes are hard. At the same time, relying too much on OBS increases the overall instability.
You might ask: are there any solutions that make our multi-platform streaming easier and more stable?
The answer is yes. For professional streamers or gamers, using a hardware encoder is a better choice. Normally, a hardware video encoder gives you the following benefits:
1. Easy connection. Videos are sending from PC to encoder via cable connection (normally HDMI), and the encoder is connected to the Internet via Ethernet;
2. Integrated configuration. On the web-based console of the encoder, we can easily configure our stream settings in one place (for multiple platforms). Once configured, the following stream experience will be transparent to users;
3. 24/7 operation. Hardware video encoders are designed for a long-time stable working at low power consumption. So, if you are working in a team and want to stream all the time, a hardware encoder is a good choice:
4. Video source variety. Other than standard screen capture, hardware encoders can get all types of video sources (such as cameras or webcams), which enlarges your range of stream materials.
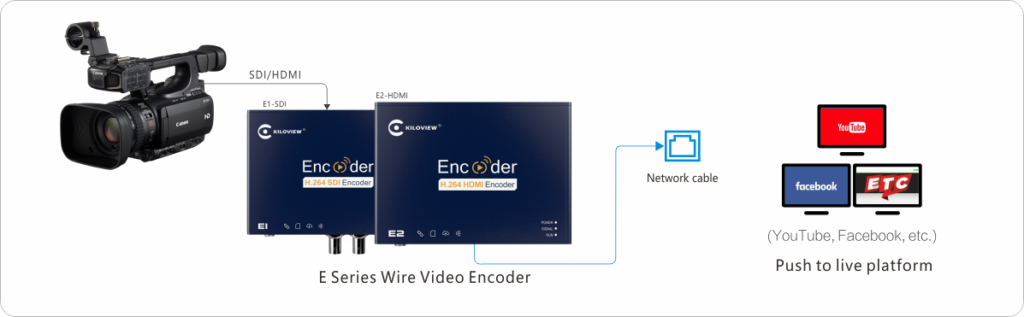
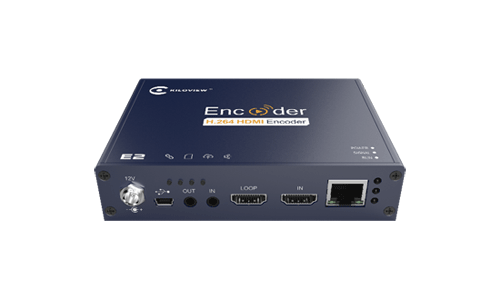
Kiloview E2 H.264 encoder is a suitable device for beginners, as it comes with 1080P video streaming up to 16 platforms. Meanwhile, the competitive price and free technical support won’t let you down.
To start our stream to Youtube, Twitch and Facebook using a hardware encoder, we need to do some initial configuration for network settings and accessibility. For Kiloview E series, you can get documentation here.

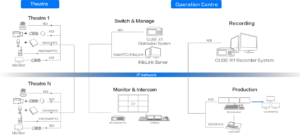
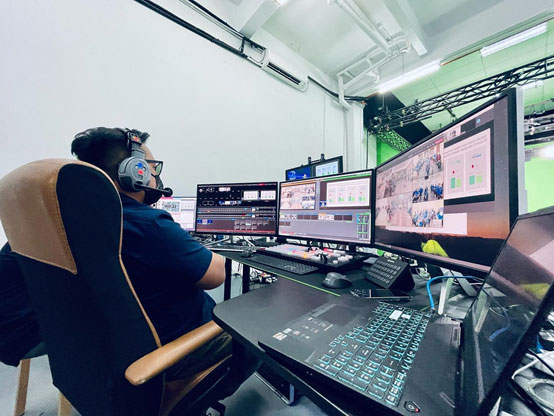
Next, we will connect our gear to the computer and network:

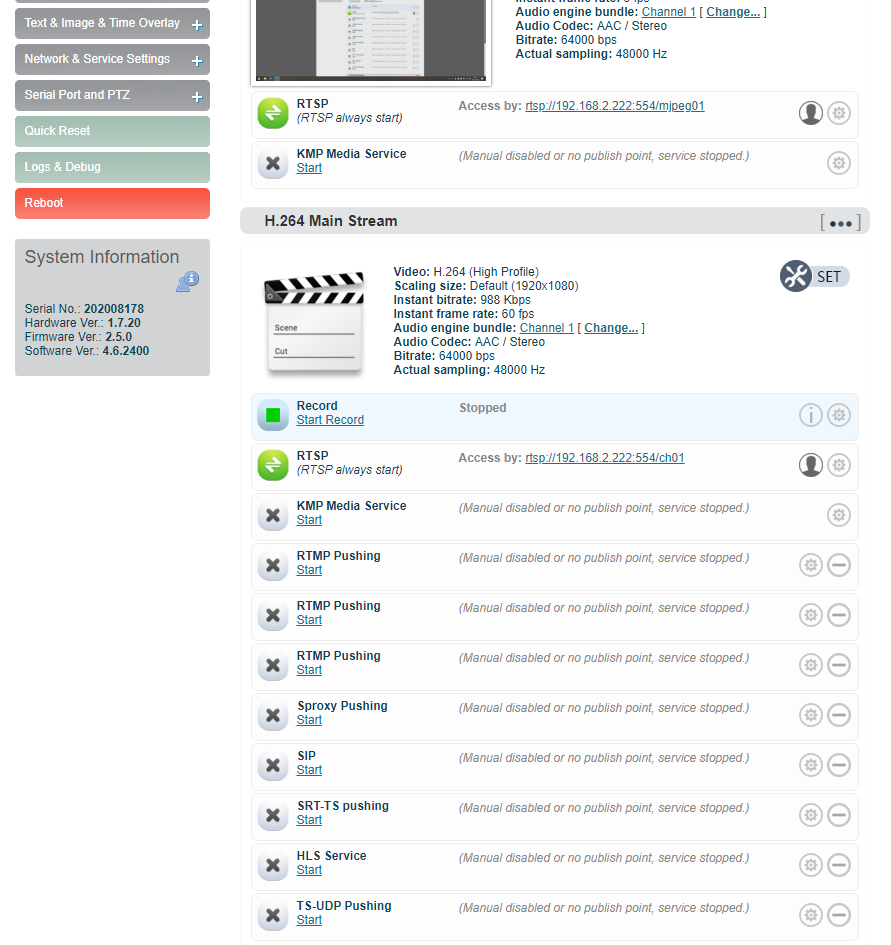
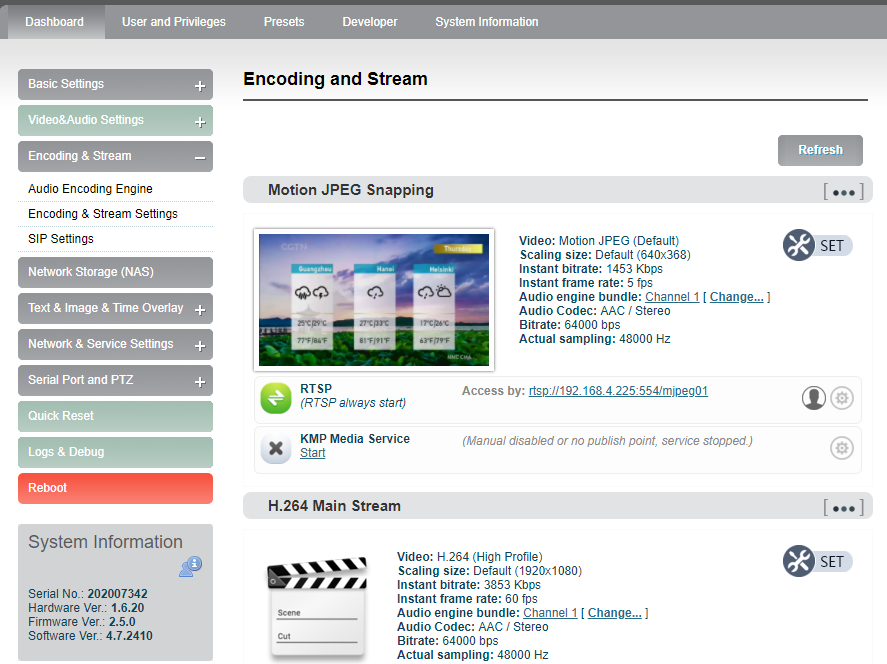
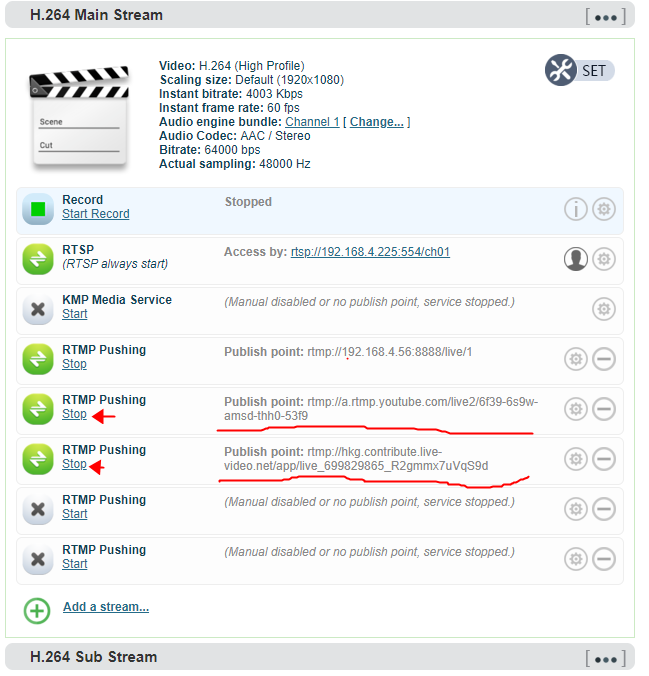
Then, we should find the video preview in “Encoding & Stream” -> “Encoding & Stream Settings” in the encoder’s console page:
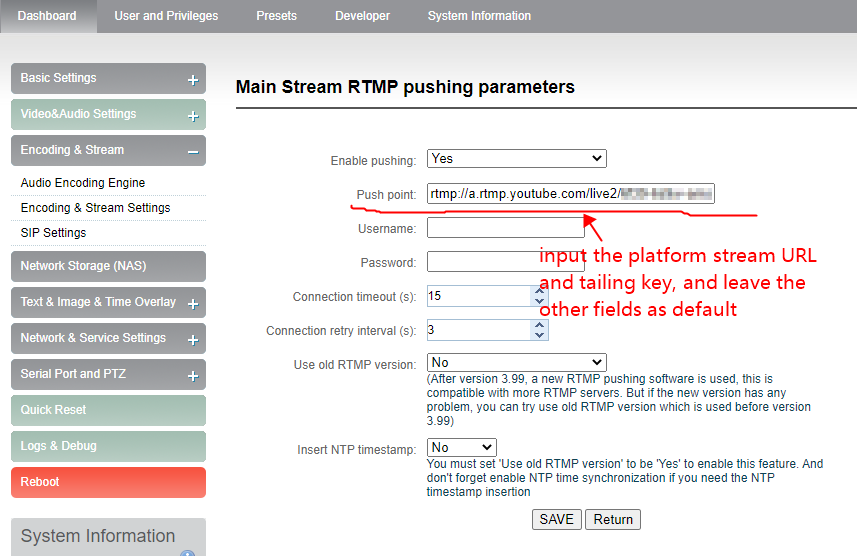
Next, in “H.264 Main Stream” under the same panel, we can add multiple RTMP streams and set the pushing URL/Key separately. If you have problems getting your own streaming URL (remote destination RTMP URL address) and stream key, please refer to relevant content in our streaming solution 2 above:
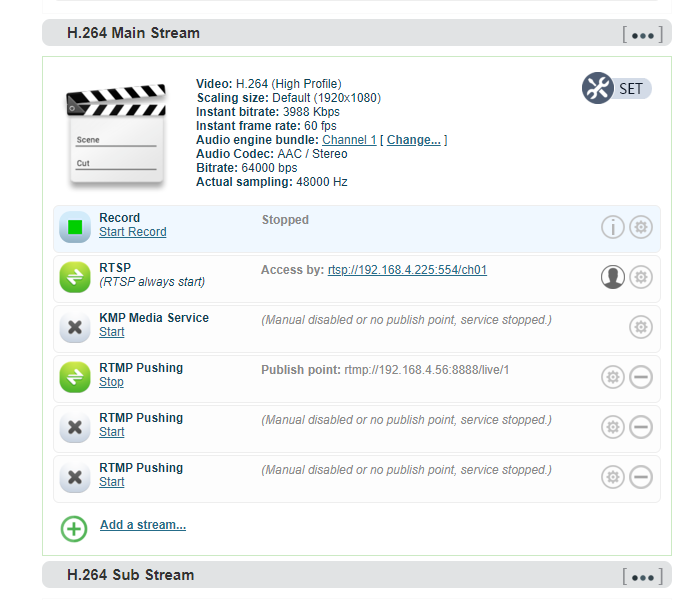
When we finished the RTMP server configuration, toggle the button in the front to start/stop our stream.
That’s it, enjoy.
FAQ about Multi-platform Stream
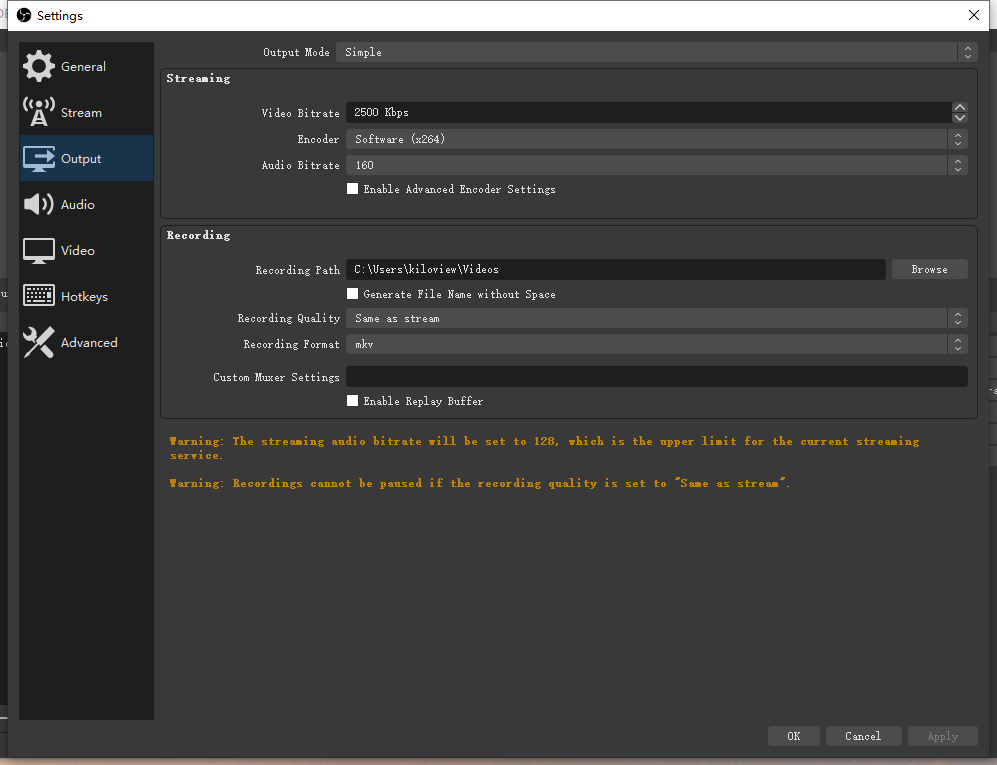
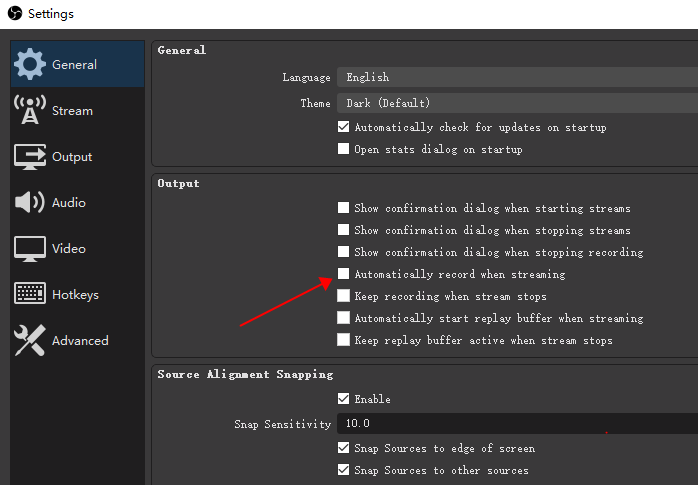
Q: Can OBS stream and record at the same time?
A: Yes, we can stream and record in OBS at the same time by clicking the corresponding buttons on the “Controls” panel:

Meanwhile, it’s recommended to tick the “Automatically record when streaming” option in settings if necessary:
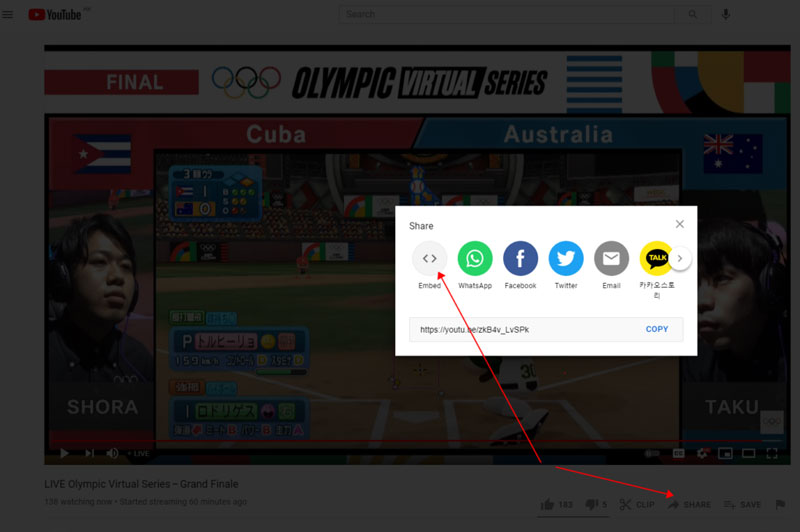
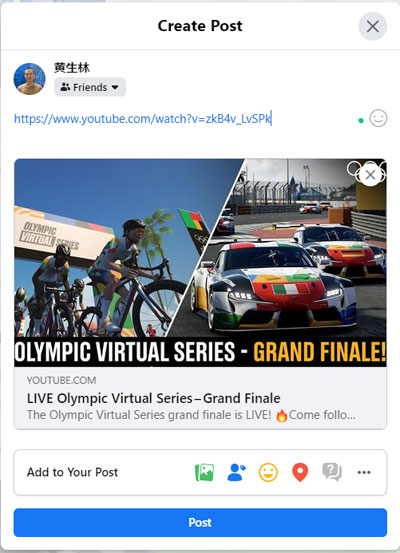
Q: How to Embed YouTube live stream on Facebook?
A: First, go to any YouTube live stream page, and click on the “share” button:
Q: How to get my Facebook/Youtube/Twitch stream key?
A: For Youtube stream key, please refer to “Streaming Solution 2: OBS (Screen Capture) + Multi-RTMP Plugin” above.
For Facebook stream key, go to https://www.facebook.com/live/producer/
For Twitch stream key, go to https://dashboard.twitch.tv/settings/stream
Q: How to stream with two computers?
A: Just as we illustrated in solutions 4 and 5, we can play a game on computer A and capture & stream on computer B by capture card or Apps such as NDI screen capture. The benefits are:
- Your computer is not overstressed from running a game and streaming;
- Your game will not be slowed down because of a balanced bandwidth cost;
- You can interact with your audience better because of two isolated screens;
Q: How to stream from Xbox/PS4 to YouTube?
A: For PS4, you can find a built-in option in “Settings” -> “Account” -> “Link with Other Services” to connect your YouTube account for streaming. For Xbox, you need a streaming tool (OBS or hardware encoder) to push your live stream online.
Q: How to share twitch stream on Facebook?
A: Open Twitch, go to the target stream, tap the sharing icon on the top bar, choose “Facebook” from the pop-up list, and post it.
Q: How much data does twitch live use? What is the twitch recommended upload speed?
A: According to Twitch, the recommended bitrates for different video resolutions are:
- 6000 kbps – 1080P 60fps
- 4500 kbps – 1080P 30fps
- 4500 kbps – 720P 60fps
- 3000 kbps – 720P 30fps
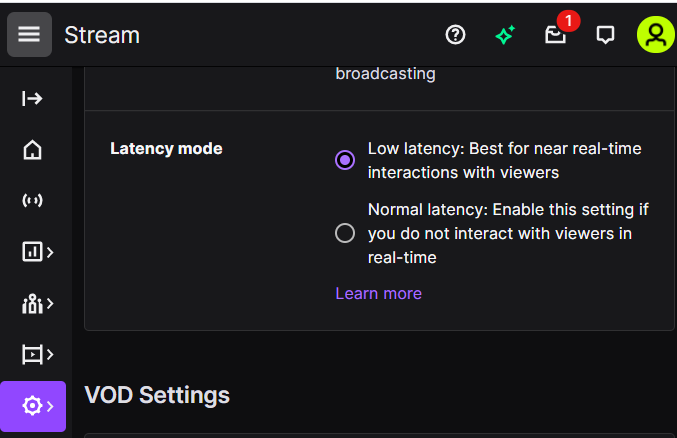
The default Twitch streaming speed mode for desktop Chrome, Firefox, Edge, and the Twitch desktop app is “Low Latency”, which enables real-time communications with viewers but increases bandwidth cost. You can opt-out for normal latency mode if your streaming suffers from a weak network.
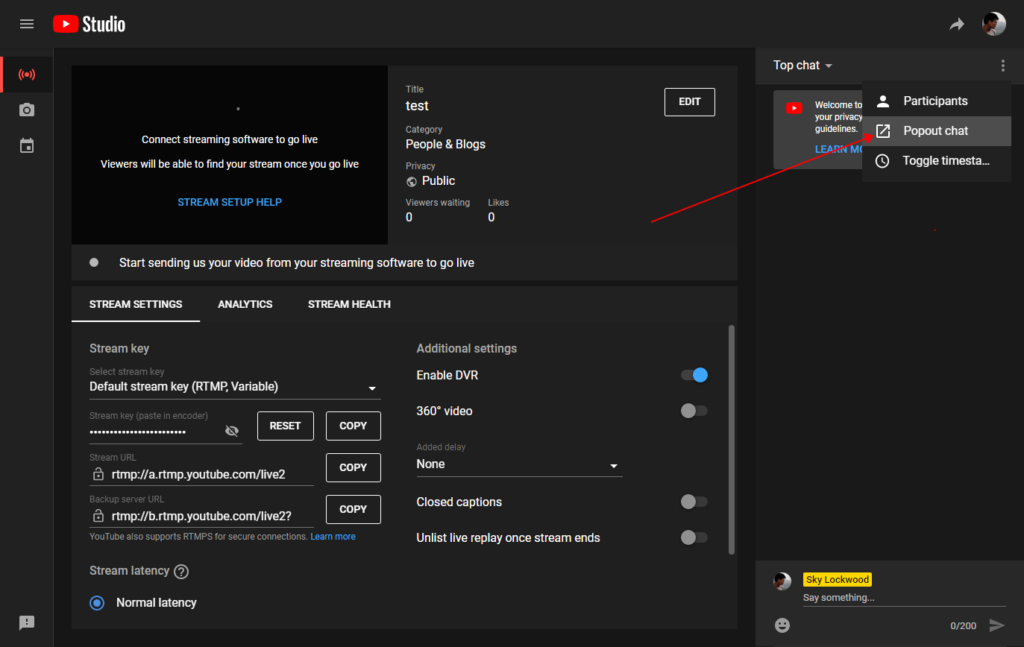
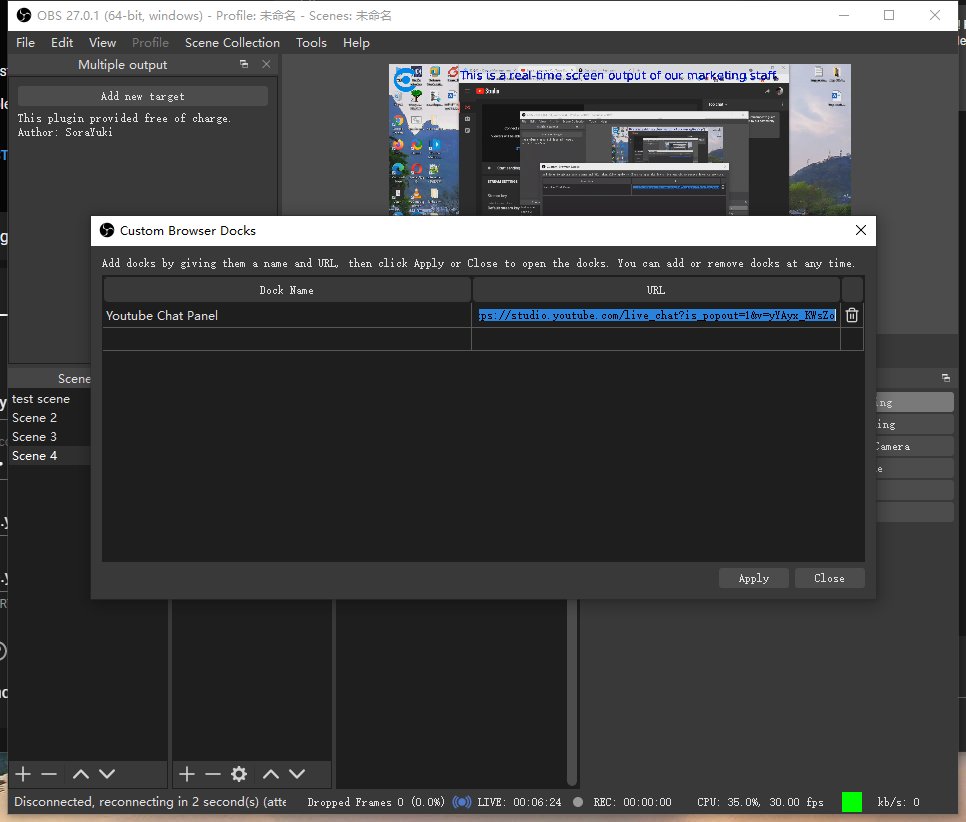
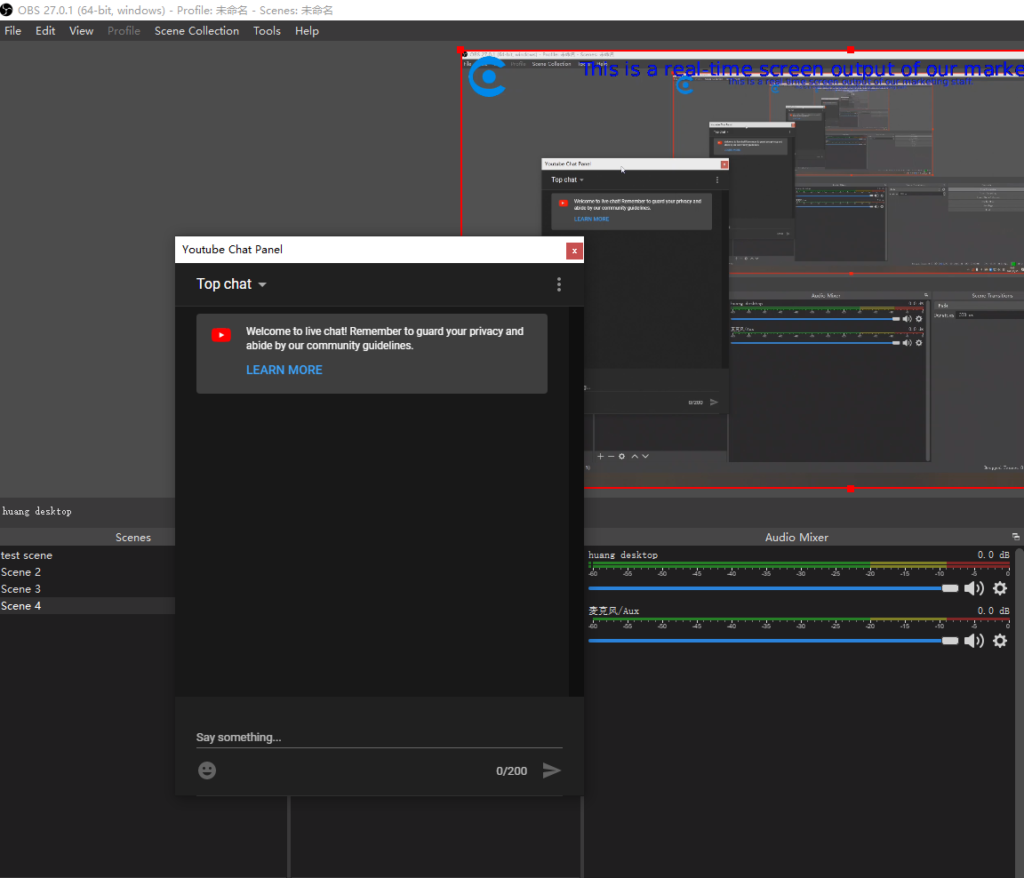
Q: How to add YouTube chat to OBS?
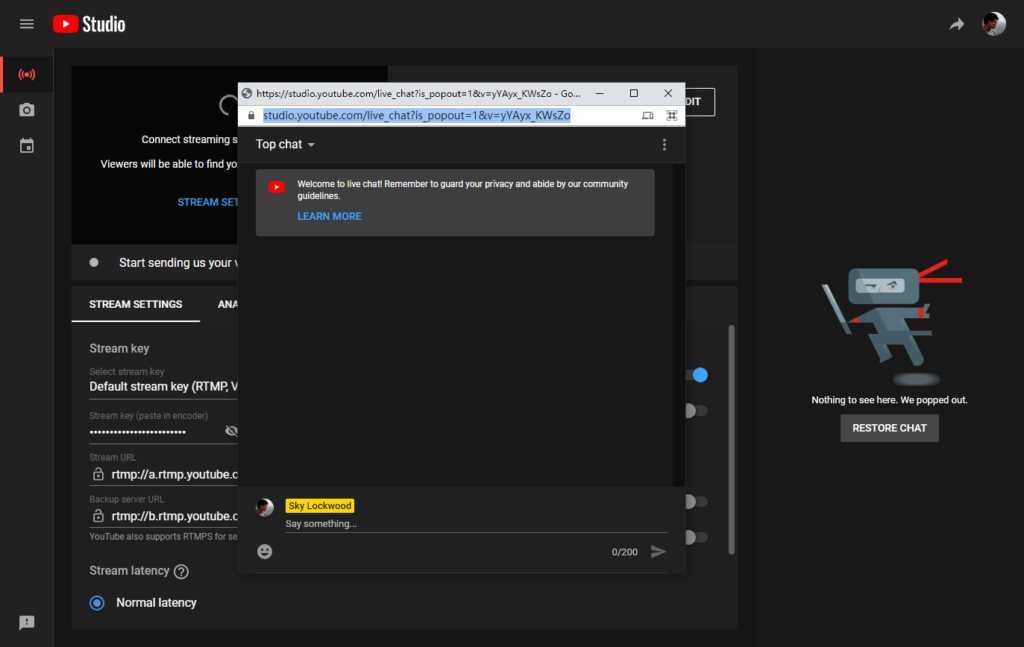
A: Open YouTube Studio, and go to the live console page. Then click the dotted menu on the top right, and choose “Popout chat” from it:
Copy the URL from the pop-out chatting browser window:
Back to OBS, choose “View” -> “Docks” -> “Custom Browser Docks”:
Here we’ve imported the Youtube live chat to OBS:
Q: Which one is better, YouTube vs twitch streaming?
A: It depends on your niche, platform rules, profit expectations of the two platforms. Normally, Twitch is a proper platform that caters to the game community, while streamers can find their niche on Youtube. For punishment, Youtube tends to be more lenient than Twitch. Meanwhile, Youtube’s watching recommendation algorithm is more favorable for new streamers.