

NDI (Network Device Interface), a network device interface, is a copyright-free standard developed by NewTek Corporation, which enables compatible videos to communicate, transmit, and receive broadcast-level videos in a high-quality, low-latency, and frame-accurate manner, making it suitable for switching in the live broadcast production environment. In this document, Kiloview will introduce how to use VMIX to output content and receive NDI video streams with local network through NDI.
1. VMIX pulls NDI stream
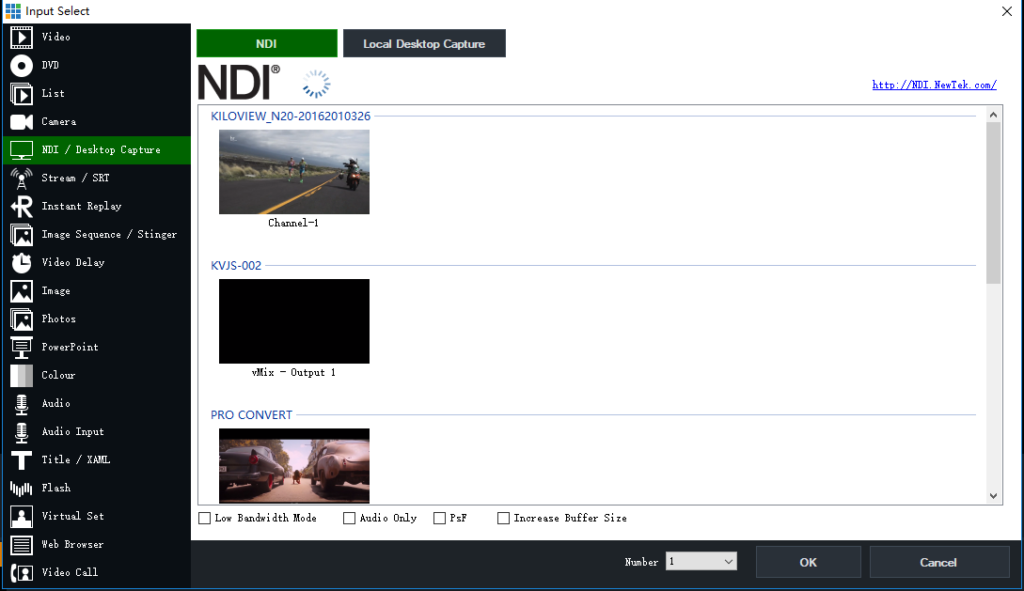
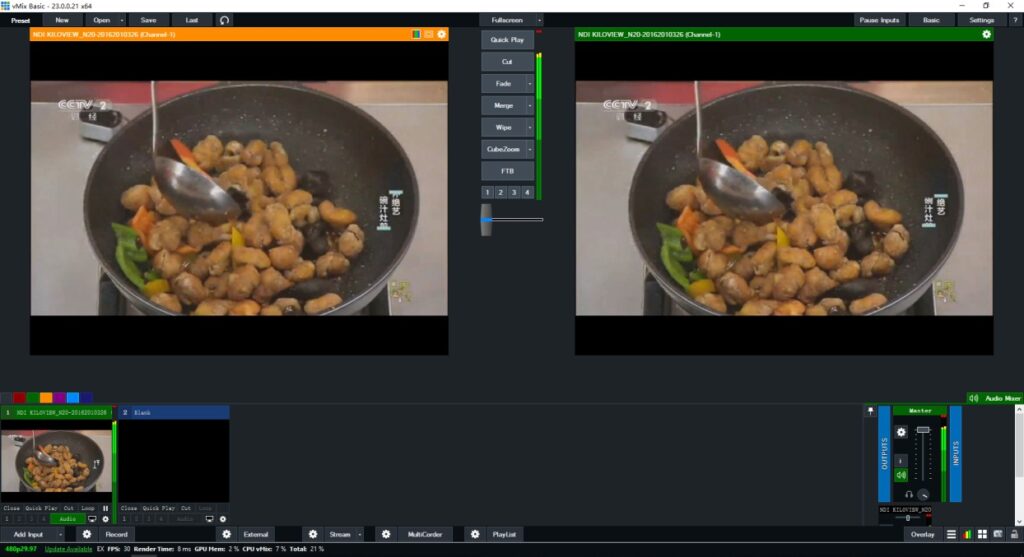
Open VMIX software and click “Add Input” in the lower left corner, you can show that you can add a variety of sources. Click “NDI / Desktop Capture” , you can see a list of NDI devices. You can choose to add device and channel, click “OK” to add this encoder video source to the VMIX play source list.
Note: If the front-end NDI source is NDI | HX, you need to download and install the NDI | HX driver on the NEWTEK official website first.
(https://www.newtek.com/ndi/tools/#)
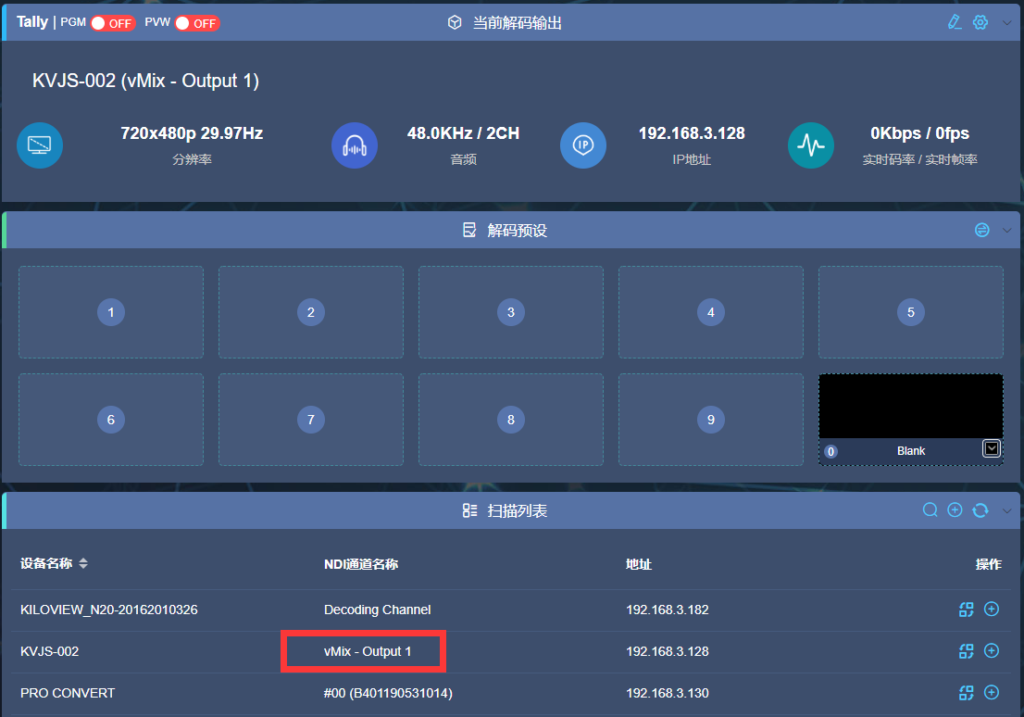
We can see the KILOVIEW N20 video stream in the discovery list. Select this stream and click “OK” to add it to VMIX.
2, VMIX outputs NDI stream
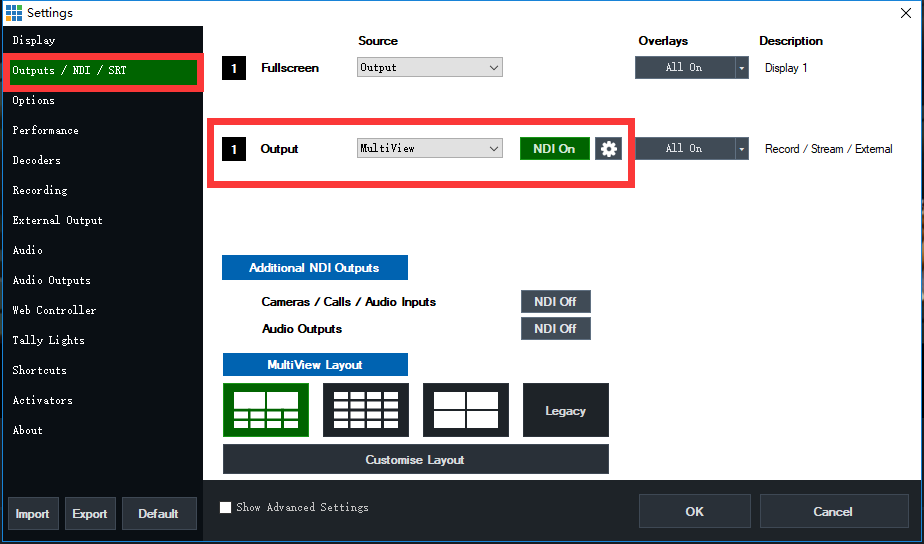
Click the setting button pointed by the arrow below the software, select “Output / NDI” to enter the setting interface in the pop-up dialog box.

After entering the setting interface, select “Output / NDI / SRT” and you can see “1-Output” on the right. “NDI ON” indicates that the NDI output has been turned on, and the source to be output can be selected in the drop-down selection box.
Note: More advanced versions of VMIX can be set to output multiple NDI streams.
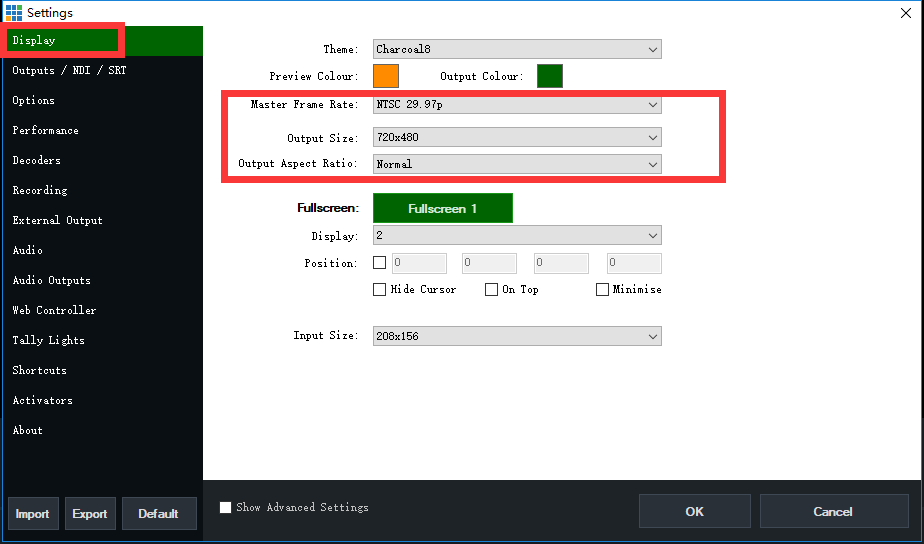
The resolution ratio and frame rate of the output can be selected in the menu “Display”.
You can see the stream output by VMIX on the Kiloview’s N20 decoding page. Click to decode the output.