

Recently Kiloview released a new version of D300 4k that supports NDI|HX2. This article today will give an introduction of decoding NDI|HX2 videos with D300 4k decoder.
Right now Kiloview’s N1、N2、E1-NDI、E2-NDI codecs have supported the upgrading to NDI®|HX2, Among them Kiloview NDI|HX compatible decoders include D300 decoder and MG300 media gateway.
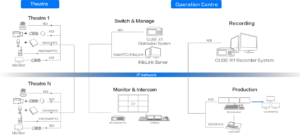
The following figure is the schematic diagram of E1-NDI and D300 using NDI|HX2 transmission connection:

Both the encoder and the decoder can configure the Ethernet address through DHCP or manually configure to realize the transmission and decoding of the encoded NDI in the local area network to the monitor.
1. Encoder configuration
You can configure the NDI device name and channel name, or define the group where the NDI is located on the WEB page of the Kiloview Encoder. You can also define the group where the NDI is located (the settings include the group setting, namely, the encoder has been upgraded to NDI|HX2) as the public group.
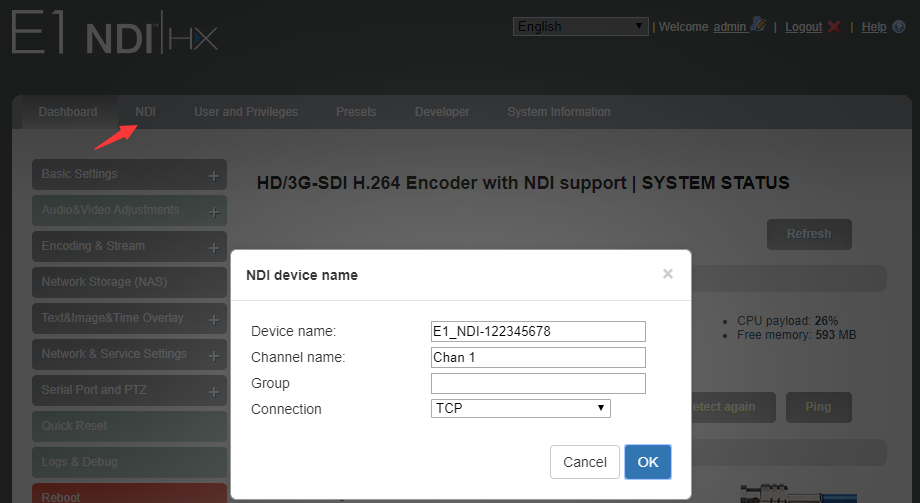
Note: Versions previous to V4.3.2029 (inclusive) only supports NDI|HX, and its later versions can be upgraded to NDI|HX2.
2, D300 decoder configuration
There are three different ways of decoding to discover/add NDI sources:
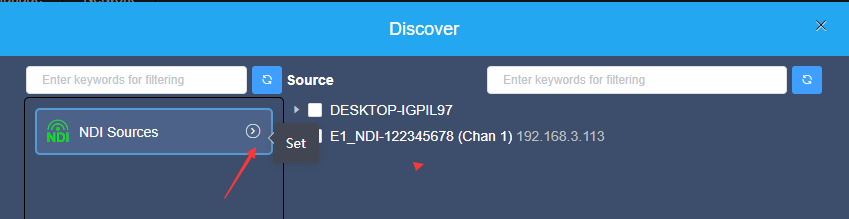
1) Log in to the decoder’s WEB page and add the NDI|HX2 video source through automatic discovery
Go to the”Media”-“Discovery” on the decoder page, you can find the NDI video source of the public group in the same network segment along the NDI sources in the pop-up dialog box. According to the device name and channel name of the NDI source, select the source to be added, click “Add”, the video source will be added to the video source list.
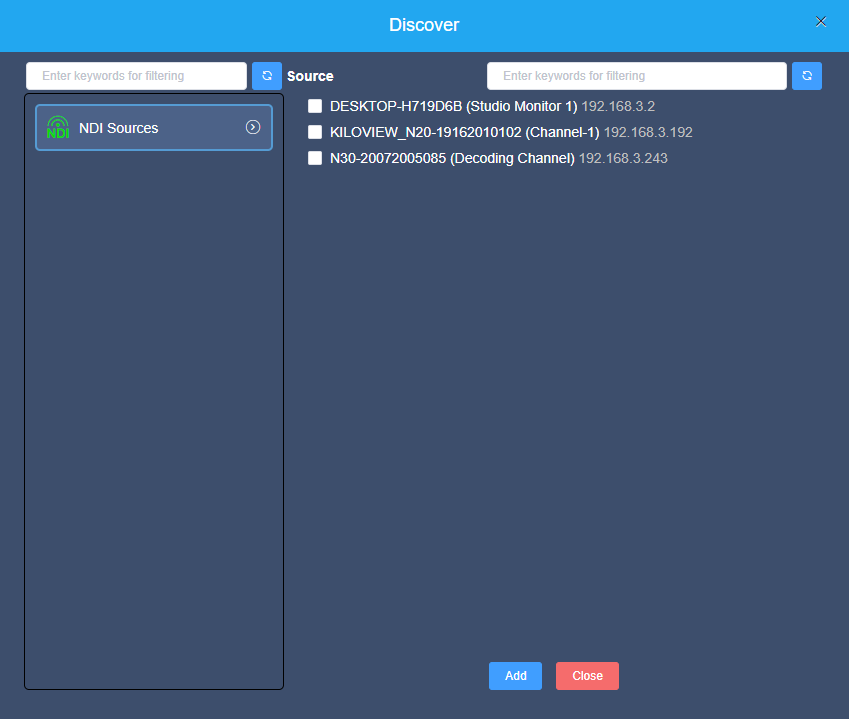
Note: You can search all video sources including NDI High Bandwidth and NDI|HX2 in the network through “Discovery” – NDI sources of NDI 4.0 or higher. D300 decoder only supports decoding of NDI|HX2 video sources. For NDI High Bandwidth video sources, choose other NDI products such as N4/N40/N3/N30.
How to determine whether an NDI source is NDI High Bandwidth or NDI|HX version, please refer to the How do I Distinguish NDI Stream with Tool – NDI Analysis?
2) Manually add NDI|HX video source of non-public group or cross-segment IP
Click “NDI Sources”-“Settings” to enter the configuration dialog. If you want to search for devices with different group names in the same sub-net, fill in the specified group name (such as kiloview) in the “Group” box and click Enter. At this time, two groups will be displayed in the “Group” box Name, and then click the “OK” button (no need to fill in the IP address), the device will search for the NDI source of these two group names at the same time. (You can also add multiple group names to search)
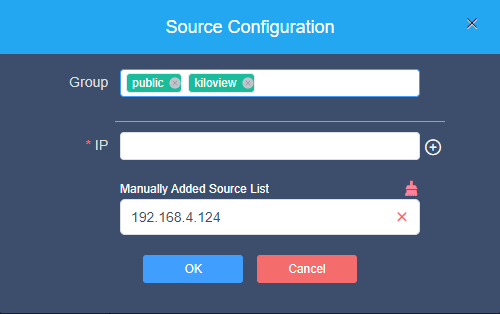
When you need to search for NDI sources across network segments, if the group name is a non-public group, you need to fill in the specified group name first, and then fill in the specified IP address in the “IP” item, click the button

after it, this IP address will be Add to the “Manual Scan Address List”, you can add multiple IP addresses to search at the same time, and then press “OK” to save.

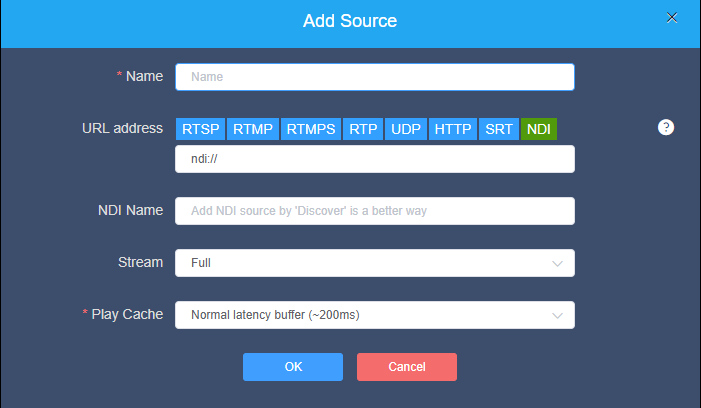
3) Manually fill in the URL address to add NDI|HX video source
On the decoder page “Media” – “Add”, select “NDI”, fill in the corresponding parameters and save.
Name: can be arbitrarily configured, supports numbers combinations;
URL address: ndi://source IP address: port (the port default as 5961);
NDI name: source device name (channel name);
Stream: You can choose Full (main stream) and Preview (sub stream);
Play buffer: Select the play buffer according to the actual scene.
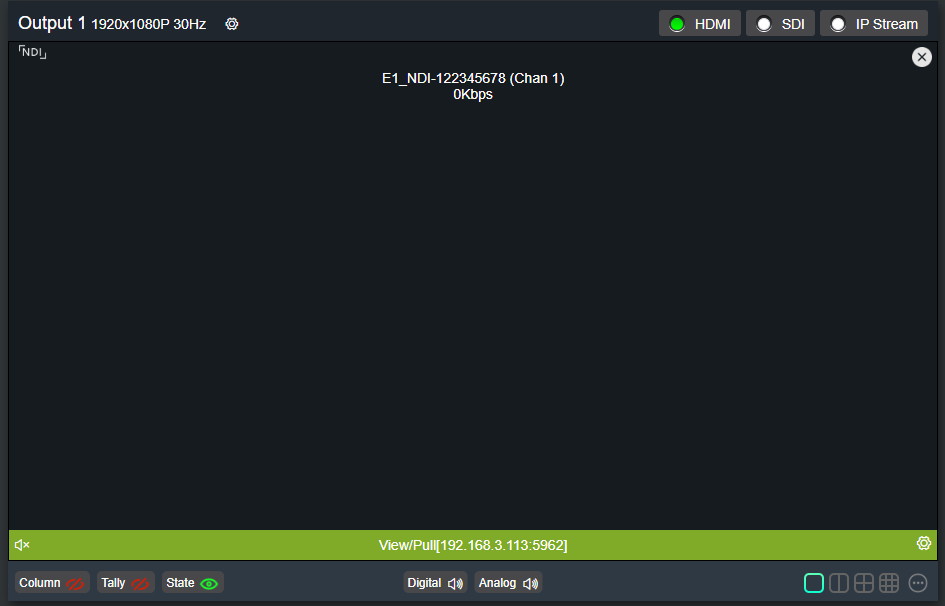
4) After the NDI source is added, it will be displayed in the video source bar of the decoder.
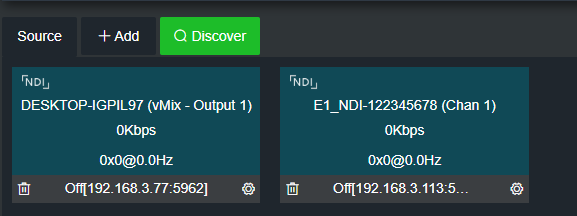
Drag the video source to the output box, the decoder starts to decode and output.